You know that bunch of bananas sitting on your counter? The ones that are starting to get those brown spots?
Don’t toss them.
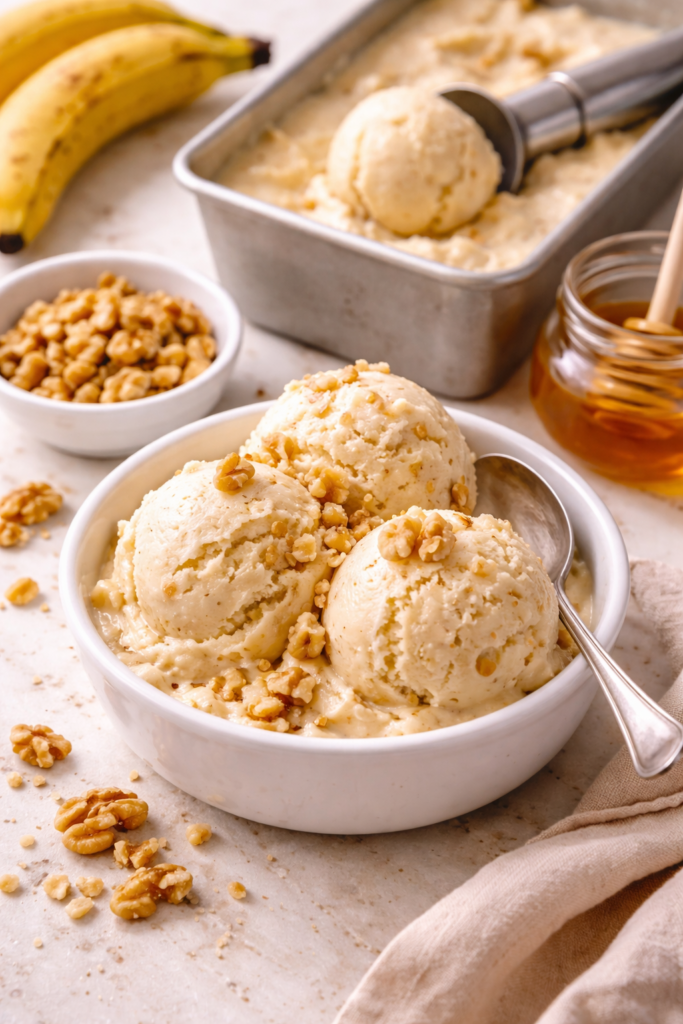
Turn them into the creamiest, most ridiculously good ice cream you’ve ever made. And I’m talking about ice cream that rivals anything you’d pay $8 a pint for at the grocery store.
Here’s the wild part: you only need one ingredient. Just bananas. That’s it.
I stumbled onto this recipe when I was broke, craving ice cream, and had nothing but overripe bananas in my kitchen. I froze them out of desperation (couldn’t let them go to waste), and then I got curious.
What happened next changed my dessert game forever.
This isn’t some sad “healthy alternative” that tastes like frozen sadness. This is actual, creamy, scoopable ice cream that happens to be made from fruit. The texture is so smooth that people will straight up not believe you when you tell them what’s in it.
I’ve made this for friends who are lactose intolerant, for my niece who’s obsessed with anything banana, and for myself when I want something sweet without the guilt spiral that follows a pint of Ben & Jerry’s.
And you can customize it in about a thousand different ways. Chocolate chips? Yes. Peanut butter swirl? Absolutely. Caramel drizzle? Don’t even get me started.
Let me show you how to make it.
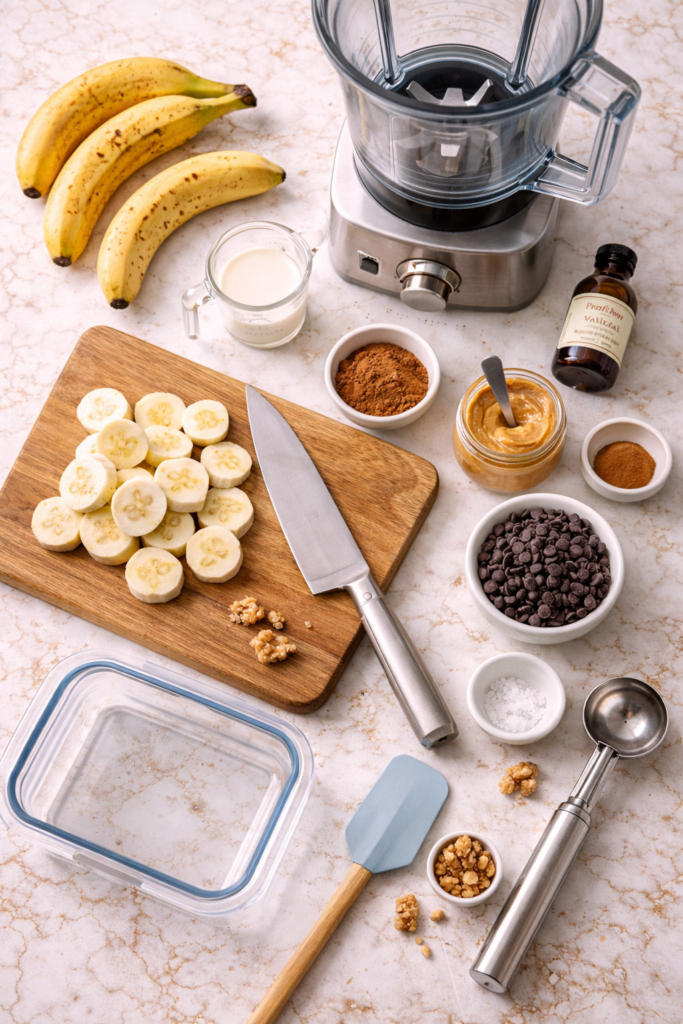
What You’ll Need
For Basic Banana Ice Cream:
- 4 ripe bananas (the spottier, the better)
- 1-2 tablespoons milk of choice (optional, only if needed for blending)
For Flavor Variations:
- 2 tablespoons cocoa powder (for chocolate version)
- 2 tablespoons peanut butter or almond butter (for nutty version)
- 1 teaspoon vanilla extract (for vanilla bean version)
- 1/4 cup mini chocolate chips (for mix-ins)
- 2 tablespoons maple syrup or honey (if you want it sweeter)
- Pinch of salt (brings out the banana flavor)
- 1/2 teaspoon cinnamon (for spiced version)
Tools You’ll Need:
- Sharp knife
- Cutting board
- Freezer-safe container or zip-top bag
- High-powered blender or food processor
- Spatula
- Ice cream scoop
- Airtight container for storage
How to Make Banana Ice Cream
Step 1: Prep Your Bananas
Peel those bananas and slice them into coins about 1/2 inch thick.
The thinner you slice them, the easier they’ll blend later. Trust me on this one. I learned the hard way when I tried freezing whole bananas and nearly broke my blender.
Step 2: Freeze Them
Spread the banana slices on a parchment-lined baking sheet in a single layer. Don’t let them touch or they’ll freeze into one big banana clump.
Pop the sheet in the freezer for at least 2 hours. I usually do this overnight because I’m impatient and I don’t want to wait around.
If you’re meal prepping, you can transfer the frozen slices into a freezer bag once they’re solid. They’ll keep for up to 3 months.
Step 3: Blend Until Creamy
This is where the magic happens.
Toss your frozen banana slices into a high-powered blender or food processor. Start blending on low, then gradually increase the speed.
First, it’ll look like chunky banana gravel. Keep going.
Then it’ll clump up into what looks like banana crumbles. Keep. Going.
After about 3-5 minutes, it’ll suddenly transform into this smooth, creamy, soft-serve consistency that’ll make you question everything you thought you knew about ice cream.
If your blender is struggling, add a tablespoon of milk at a time. But don’t add too much or you’ll end up with a smoothie instead of ice cream.
Step 4: Add Your Mix-Ins
Once you’ve got that perfect creamy texture, this is when you stir in whatever you want.
Cocoa powder for chocolate ice cream? Fold it in now.
Peanut butter swirl? Drizzle it on top and gently swirl with a knife.
Chocolate chips? Stir them in quickly before the ice cream melts.
The banana ice cream is pretty soft at this point, so you can eat it immediately as soft-serve. It’s insanely good like this.
Step 5: Freeze for Scoopable Ice Cream (Optional)
If you want traditional scoopable ice cream, transfer it to an airtight container and freeze for another 2-3 hours.
Let it sit at room temperature for about 5 minutes before scooping. It firms up more than regular ice cream, so this step makes it easier to scoop.
Pro Tips
Use really ripe bananas. The browner the better. Those black spots mean natural sweetness, which translates to better-tasting ice cream. Green or barely yellow bananas will give you bland ice cream that tastes like frozen disappointment.
Don’t skip the single-layer freeze. I know it seems fussy, but if your banana slices freeze in a clump, you’ll spend 10 minutes trying to pry them apart with a butter knife. Just spread them out on the baking sheet. Future you will be grateful.
Blend in batches if needed. If your blender isn’t super powerful, blend 2 bananas at a time instead of all 4. It’ll blend smoother and you won’t burn out your motor. I learned this after my old blender started making concerning sounds halfway through.
Be patient with the texture transformation. It takes a few minutes of blending for the bananas to go from chunky to creamy. Don’t panic when it looks crumbly. Don’t add liquid yet. Just keep blending. It’ll come together.
Taste before you freeze. Once you’ve added your mix-ins, give it a taste. Too sweet? Add a pinch of salt. Not sweet enough? Drizzle in some honey. You can adjust everything before the final freeze.
Substitutions and Variations
Can’t do bananas? This recipe is pretty banana-specific, but you can try using frozen mango or frozen peaches for a different fruit ice cream. The texture won’t be quite as creamy, but it’s still good.
Dairy-free? This is already dairy-free as written. If you add milk for blending, use almond milk, oat milk, or coconut milk.
Want it sweeter? Add a tablespoon of maple syrup, honey, or agave. Or blend in a couple of dates for natural sweetness.
Chocolate lovers? Use 2-3 tablespoons of cocoa powder and add chocolate chips. You basically have homemade chocolate ice cream.
Peanut butter cup version? Swirl in 3 tablespoons of peanut butter and add chopped peanut butter cups. This is dangerously good.
Coffee ice cream? Add 1-2 tablespoons of instant espresso powder. It tastes like a frozen coffee drink.
Mint chip? Add 1/2 teaspoon peppermint extract and dark chocolate chips. Refreshing and decadent at the same time.
Caramel banana? Drizzle caramel sauce on top and sprinkle with sea salt. This feels fancy but takes 30 seconds.
Berry swirl? Blend in 1/2 cup of frozen strawberries or blueberries for a fruity twist. The color turns out really pretty too.
Make-Ahead Tips
Prep banana slices in bulk. Whenever you have bananas getting too ripe, peel them, slice them, and freeze them in bags. Label with the date. You’ll always have banana ice cream ready to go.
Pre-portion for single servings. Freeze banana slices in individual portions (about 1 banana per serving). When you want ice cream, just grab one bag and blend. No need to measure anything.
Keep mix-ins ready. Store chocolate chips, chopped nuts, and other toppings in your freezer. Everything stays fresh and you can make different flavors whenever the craving hits.
Nutritional Information
Per serving (1 banana, plain version):
- Calories: 105
- Fat: 0.4g
- Carbohydrates: 27g
- Fiber: 3g
- Sugar: 14g (natural fruit sugar)
- Protein: 1.3g
- Potassium: 422mg
- Vitamin C: 10mg
This is naturally vegan, gluten-free, and dairy-free. Add-ins will change the nutritional content.
Pairing Suggestions
This banana ice cream is good on its own, but here’s how to level it up:
With warm brownies. The temperature contrast is chef’s kiss. Cold ice cream, warm brownie. It just works.
Topped on waffles. Sunday brunch just got better. Add some sliced strawberries and you’ve got a breakfast that feels like dessert.
In a smoothie bowl. Use it as the base for an acai-style bowl. Top with granola, fresh fruit, and coconut flakes.
With pound cake. Slice up some pound cake, toast it lightly, and top with a scoop of banana ice cream. This is what I make when I’m trying to impress someone.
Alongside apple pie. Banana ice cream with warm apple pie is an underrated combination. The flavors complement each other perfectly.
Leftovers and Storage
Freezer storage: Store in an airtight container in the freezer for up to 2 weeks. It’ll get harder over time, so let it sit at room temperature for 5-10 minutes before scooping.
Preventing ice crystals: Press a piece of parchment paper directly on the surface of the ice cream before sealing the container. This keeps ice crystals from forming on top.
Re-blending leftovers: If your ice cream gets too hard, you can actually re-blend it. Just break it into chunks and pulse it in the blender again. It’ll soften right back up.
Individual portions: Freeze in small containers or even in ice cube trays. Pop out a portion whenever you want a quick treat.
FAQ
Why isn’t my banana ice cream creamy?
Your bananas probably weren’t frozen long enough, or your blender isn’t powerful enough. Make sure the banana slices are completely frozen solid (at least 2 hours). If your blender is struggling, try adding a tablespoon of milk or blending in smaller batches.
Can I use fresh bananas instead of frozen?
No. Fresh bananas will give you a smoothie, not ice cream. The freezing process is what creates that creamy, ice cream-like texture. You need those frozen bananas.
How ripe should my bananas be?
The riper, the better. Look for bananas with lots of brown spots. They’re sweeter and have more flavor. Green or barely yellow bananas will taste bland and won’t be sweet enough.
Will this taste like a banana smoothie?
Not if you blend it right. The texture is completely different. It’s thick, creamy, and scoopable. It tastes more like ice cream than smoothie. The banana flavor is there, but it’s subtle and sweet, not overwhelming.
Can I add protein powder?
You can, but it changes the texture. Add 1 scoop of protein powder during blending. It’ll make the ice cream slightly less creamy and more dense, but it works if you want extra protein.
Is this actually healthy?
It’s healthier than regular ice cream because it’s just fruit with no added sugar, cream, or preservatives. But bananas do have natural sugar, so don’t go eating an entire batch in one sitting. It’s a treat, just a better-for-you one.
Can I make this without a blender?
Not really. A food processor works, but you need something powerful enough to break down frozen fruit. A regular hand mixer won’t cut it.
Why does mine have ice chunks?
Your bananas might have freezer burn, or there’s too much moisture. Make sure you’re storing the frozen bananas in an airtight container or bag. Also, don’t add too much liquid when blending.
Can kids help make this?
Absolutely. Kids can help peel and slice the bananas (with supervision), arrange them on the baking sheet, and choose the mix-ins. Just keep them away from the blender blade.
Does it work with plantains?
Nope. Plantains don’t have the same sugar content or texture as bananas. Stick with regular bananas for this recipe.
Wrapping Up
This banana ice cream recipe changed how I think about dessert.
It’s proof that you don’t need fancy equipment or a mile-long ingredient list to make something incredible. Just bananas, a freezer, and a blender.
The first time I made this, I was skeptical. Frozen bananas turning into ice cream sounded like food blogger nonsense. But then I tasted it and I got it.
Now I always have frozen banana slices in my freezer. It’s become my go-to when I want something sweet but don’t want to derail my entire week.
Make a batch this weekend. Add chocolate chips. Swirl in some peanut butter. Top it with caramel. Make it yours.
Then come back and tell me what flavor combination you tried. Did you go classic? Or did you get creative with the mix-ins? I want to hear all about it.
Drop a comment below with your favorite add-ins or any questions you have. Let’s talk ice cream. 🍌🍦