You know that moment when you spot those brown bananas on your counter and think “ugh, I should probably throw these out”?
Stop right there.
Those spotty, almost-too-ripe bananas are about to become the star of the fluffiest, most ridiculously good pancakes you’ve ever tasted. And I’m not talking about those dense, gummy banana pancakes that taste like baby food. I’m talking about actual fluffy pancakes that just happen to be packed with sweet banana flavor.
I’ve been making these for years, and here’s what most people get wrong: they mash the bananas into oblivion and end up with pancake bricks. But there’s a trick to getting them light and airy while still tasting like banana heaven.
Trust me, once you nail this recipe, your regular pancakes are going to feel boring.
What You’ll Need
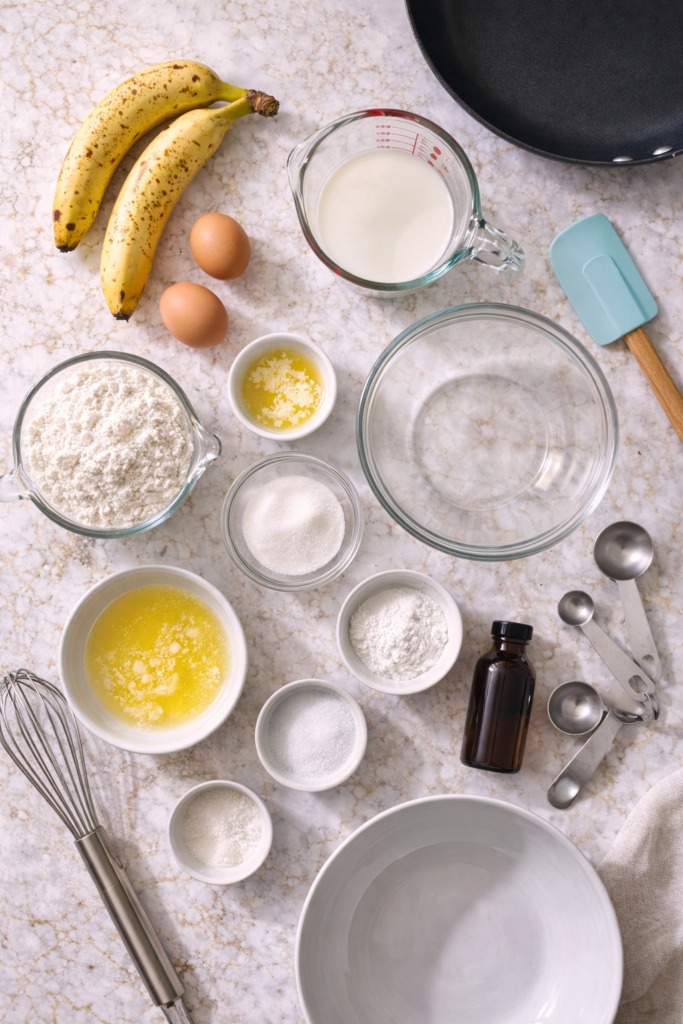
The ingredient list is short, and you probably already have most of this stuff in your kitchen right now.
For the pancakes:
- 2 large ripe bananas (the spottier, the better)
- 2 large eggs
- 1½ cups all-purpose flour
- 1 cup whole milk
- 2 tablespoons melted butter (plus more for the pan)
- 2 tablespoons granulated sugar
- 1 tablespoon baking powder
- 1 teaspoon vanilla extract
- ½ teaspoon ground cinnamon
- ¼ teaspoon salt
For serving (optional but recommended):
- Maple syrup
- Fresh banana slices
- Butter
- Chopped walnuts or pecans
- Whipped cream
- Fresh berries
See? Nothing crazy or hard to find.
Pro Tips
I’ve made these pancakes at least a hundred times, and here’s what I’ve learned along the way:
1. Use bananas that look almost dead. Those brown spots aren’t a sign of rot; they’re a sign of pure sweetness. The browner the banana, the sweeter and more flavorful your pancakes will be. If your bananas are still yellow and firm, they won’t give you the same punch of flavor.
2. Don’t overmix the batter. This is the number one mistake people make with any pancake recipe. When you see little flour streaks in the batter, stop mixing. Those lumps will disappear as the pancakes cook, and you’ll get way fluffier results. Overmixed batter = tough, chewy pancakes.
3. Let the batter rest for 5 minutes. I know you want to start cooking immediately, but giving the batter a quick rest lets the flour absorb the liquid and the baking powder start doing its thing. You’ll see tiny bubbles form on the surface, and that’s when you know it’s ready.
4. Keep your heat at medium, not high. I used to crank the heat thinking it would speed things up, but all it did was burn the outside while leaving the inside raw. Medium heat gives you golden-brown pancakes that are cooked all the way through.
5. Wait for the bubbles before flipping. When you see bubbles forming all over the surface and the edges start to look set, that’s your signal to flip. If you flip too early, you’ll end up with a mess. If you wait too long, you’ll get a dark, almost burnt pancake.
Tools You’ll Need
You don’t need any fancy equipment for these. Just grab:
- Large mixing bowl
- Medium mixing bowl
- Whisk or fork
- Measuring cups and spoons
- Non-stick skillet or griddle
- Spatula
- Potato masher or fork (for the bananas)
That’s it. No blender, no stand mixer, no special gadgets.
Substitutions and Variations
Want to mix things up or work with what you’ve got? Here are some swaps that actually work:
Milk alternatives: Any milk works here. I’ve used almond milk, oat milk, and even coconut milk. They all turned out great. Just stick with unsweetened versions so your pancakes don’t get too sweet.
Flour swaps: Whole wheat flour works, but your pancakes will be denser and a bit nuttier in flavor. For gluten-free, use a 1:1 gluten-free flour blend. I’ve tried it and it works pretty well.
Sugar alternatives: Honey or maple syrup can replace the granulated sugar. Use the same amount, but your batter will be slightly thinner.
Butter substitute: Coconut oil or vegetable oil work fine. The flavor will be a tiny bit different, but still delicious.
Mix-ins: This is where it gets fun. Throw in chocolate chips, blueberries, chopped nuts, or even a spoonful of peanut butter. I’ve done all of these and they’re all amazing.
Spice it up: Add a pinch of nutmeg, ginger, or cardamom along with the cinnamon. It gives the pancakes this warm, cozy vibe that’s perfect for lazy Sunday mornings.
Make Ahead Tips
Want to prep these in advance? Here’s how:
The batter: You can make the batter the night before and store it in the fridge. Just give it a gentle stir before cooking because it might thicken up a bit overnight. I wouldn’t go beyond 24 hours though, or the baking powder loses its magic.
Cooked pancakes: Make a huge batch and freeze them. Let the pancakes cool completely, then stack them with parchment paper between each one. Throw the whole stack in a freezer bag and they’ll keep for up to 2 months. When you want pancakes, just pop one in the toaster or microwave for 30 seconds.
This is honestly a game-changer for busy mornings. I make a double batch every few weeks and have instant breakfast ready to go.

How to Make Banana Pancakes
Okay, let’s get into the actual cooking part. This is stupid easy, I promise.
Step 1: Mash your bananas
Grab one of those super ripe bananas and mash it in a large bowl until it’s mostly smooth. A few small chunks are totally fine. This is going to be the base of your batter.
Step 2: Add the wet ingredients
Crack in the eggs, pour in the milk, add the melted butter and vanilla extract. Whisk everything together until it’s well combined. The mixture should look a little lumpy from the banana bits.
Step 3: Mix the dry ingredients
In a separate bowl, whisk together the flour, sugar, baking powder, cinnamon, and salt. This step is important because it distributes the baking powder evenly. If you skip it, you’ll get some pancakes that rise and some that don’t.
Step 4: Combine wet and dry
Pour the dry ingredients into the wet ingredients. Use a whisk or wooden spoon to mix them together, but stop as soon as you don’t see any huge flour pockets. The batter should look lumpy and thick, kind of like cottage cheese. If it looks perfectly smooth, you’ve gone too far.
Step 5: Let it rest
Walk away for 5 minutes. Seriously. Go check your phone, make coffee, do whatever. Just let that batter sit.
Step 6: Heat your pan
Place your non-stick skillet over medium heat and add a small pat of butter. Let it melt and coat the pan. You’ll know it’s ready when a drop of water sizzles on the surface.
Step 7: Cook the pancakes
Pour about ¼ cup of batter onto the skillet for each pancake. Don’t spread it out; let it spread naturally. You should be able to fit 2-3 pancakes in a standard skillet.
Watch for those bubbles to form all over the surface (this takes about 2-3 minutes). When the edges look set and you can see little bubbles popping, slide your spatula under and flip.
Cook for another 1-2 minutes on the other side until it’s golden brown.
Step 8: Keep them warm
Transfer finished pancakes to a plate and cover them loosely with foil to keep them warm while you cook the rest. Or just eat them straight from the pan like I usually do. 🥞
Step 9: Slice that second banana
Remember that second banana? Slice it up and use it for topping. The fresh banana slices add this nice contrast to the cooked-in banana flavor.
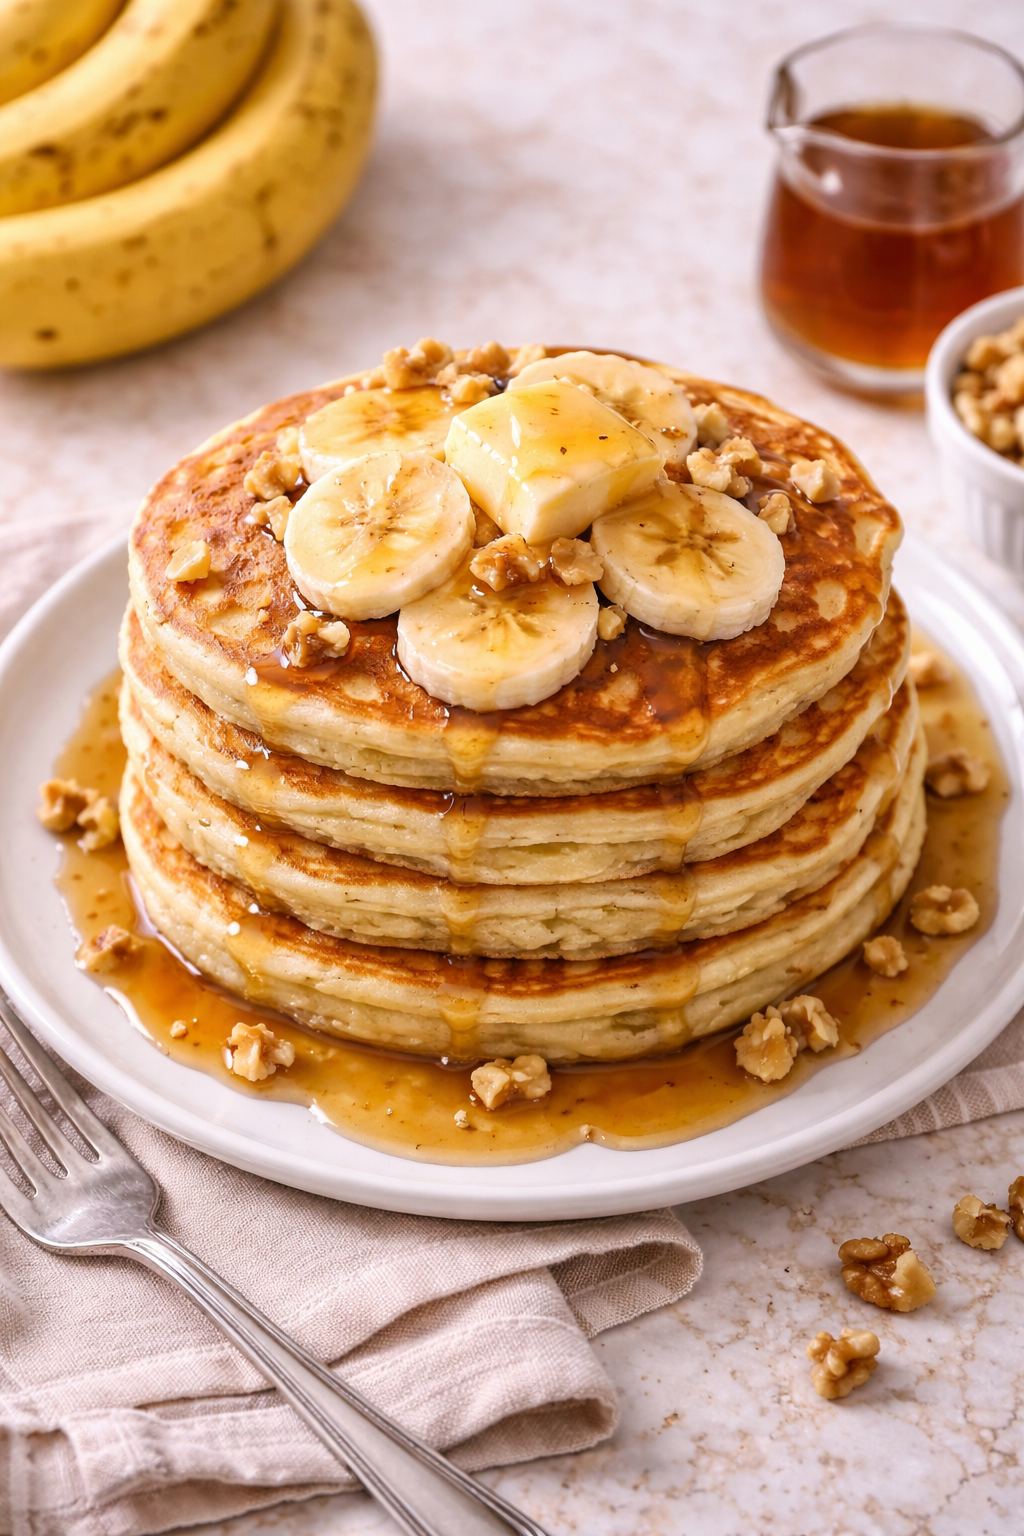
Step 10: Serve and enjoy
Stack those beauties up, drizzle with maple syrup, add your toppings, and dig in while they’re hot.
Additional Details
Let me break down some extra info that might be helpful:
Nutritional Breakdown (per serving, makes 10-12 pancakes)
| Nutrient | Amount |
|---|---|
| Calories | 140 |
| Protein | 4g |
| Carbs | 22g |
| Fat | 4g |
| Fiber | 1g |
| Sugar | 6g |
Keep in mind these numbers don’t include toppings. Add syrup and butter and you’re looking at more calories, but honestly, that’s what makes them taste so good.
Dietary Swaps
Vegan version: Replace eggs with flax eggs (2 tablespoons ground flaxseed + 6 tablespoons water, let sit 5 minutes). Use plant milk and swap the butter for coconut oil. I’ve tried this and they’re still really good, just slightly denser.
Dairy-free: Use any non-dairy milk and coconut oil instead of butter.
Lower sugar: Cut the sugar in half or skip it entirely. The ripe bananas add enough sweetness that you can get away with less added sugar.
Protein boost: Add a scoop of vanilla protein powder and reduce the flour by ¼ cup. Or throw in a tablespoon of chia seeds or ground flaxseed.
What to Serve With These
These pancakes are pretty versatile. Here are some of my favorite pairings:
- Breakfast spread: Serve with scrambled eggs and crispy bacon for a full breakfast
- Brunch vibes: Pair with fresh fruit salad and yogurt
- Coffee pairing: Goes amazing with a strong cup of black coffee or a latte
- Savory twist: Try them with a fried egg on top and a drizzle of hot sauce (sounds weird but it’s so good)
Time-Saving Tips
You can shave off some time by:
- Prepping dry ingredients the night before
- Using a griddle instead of a skillet so you can cook more at once
- Doubling the recipe and freezing extras
- Setting up an assembly line with all your ingredients measured out
The actual cooking time is about 15-20 minutes once your batter is ready, so this isn’t a long process.
Leftovers and Storage
Got extras? Lucky you.
Fridge storage: Stack cooled pancakes with parchment paper between each one and store in an airtight container. They’ll keep for 3-4 days in the fridge. Reheat in the microwave for 20-30 seconds or in a toaster.
Freezer storage: This is my preferred method. Layer pancakes with parchment paper, put them in a freezer-safe bag or container, and freeze for up to 2 months. They reheat perfectly from frozen. Just stick them in the toaster like you would a frozen waffle.
Reheating tips: The toaster is honestly the best method because it crisps up the outside while warming the inside. Microwave works in a pinch, but the texture gets a bit softer. Oven works too (350°F for 5-7 minutes), especially if you’re reheating a bunch at once.
Can you save the batter? Yes, for up to 24 hours in the fridge. Just know that the pancakes might not be quite as fluffy because the baking powder starts losing its power. But they’ll still taste good.
FAQ
Q: My pancakes are flat and dense. What did I do wrong?
You probably overmixed the batter or your baking powder is old. Baking powder loses its effectiveness over time, so check the expiration date. Also, mix just until combined and no more.
Q: Can I make these without eggs?
Yep. Use flax eggs or chia eggs (1 tablespoon ground seeds + 3 tablespoons water per egg). Let them sit for 5 minutes to thicken before adding to your batter.
Q: Why are my pancakes burning on the outside but raw in the middle?
Your heat is too high. Turn it down to medium or even medium-low. Pancakes need gentle, even heat to cook through without burning.
Q: Can I use frozen bananas?
Absolutely. Thaw them first and drain off any excess liquid. Frozen bananas actually work great because they get super soft and sweet when thawed.
Q: How do I know when to flip?
Look for bubbles forming all over the surface and edges that look dry and set. If you flip too early, the pancake will fall apart.
Q: Can I add chocolate chips?
Yes! Drop them onto the pancakes right after you pour the batter into the pan. That way they don’t sink to the bottom and they get melty and delicious.
Q: These seem sweet. Can I reduce the sugar?
You can cut it in half or even skip it. The ripe bananas add plenty of sweetness on their own.
Q: Will these work on a griddle?
Definitely. I actually prefer using a griddle because you can make more at once. Just keep the temperature around 350°F.
Wrapping Up
So there you have it. The fluffiest, most flavorful banana pancakes that’ll make you actually excited about those brown bananas on your counter.
These aren’t just a way to use up old fruit. They’re legitimately delicious pancakes that happen to be made with bananas.
The fluffy texture, the sweet banana flavor, the golden-brown exterior… they check all the boxes. And the fact that you can make them in under 30 minutes and freeze extras for busy mornings? That’s just a bonus.
Go make a batch this weekend. Top them with whatever sounds good. Eat them for breakfast, brunch, or even dinner (no judgment here).
And once you’ve made them, drop a comment below and let me know how they turned out. Did you add any fun mix-ins? Did you try any of the variations? I want to hear all about it. 💬