You’ve bought a store rotisserie chicken a thousand times. It’s 7pm, you’re tired, and honestly, it tastes pretty good.
But then you taste one that’s actually good.
The skin is crackly. The meat is impossibly juicy. The fat is rendered but not greasy. And somehow it tastes more like actual chicken than the industrial version you’ve been grabbing on autopilot.
Here’s the thing: you don’t need a rotisserie machine. You don’t need fancy equipment or restaurant-grade tricks. You need to understand what’s actually happening when a chicken cooks, and once you do, making one at home becomes genuinely simple.
This is the difference between following steps and understanding the process.
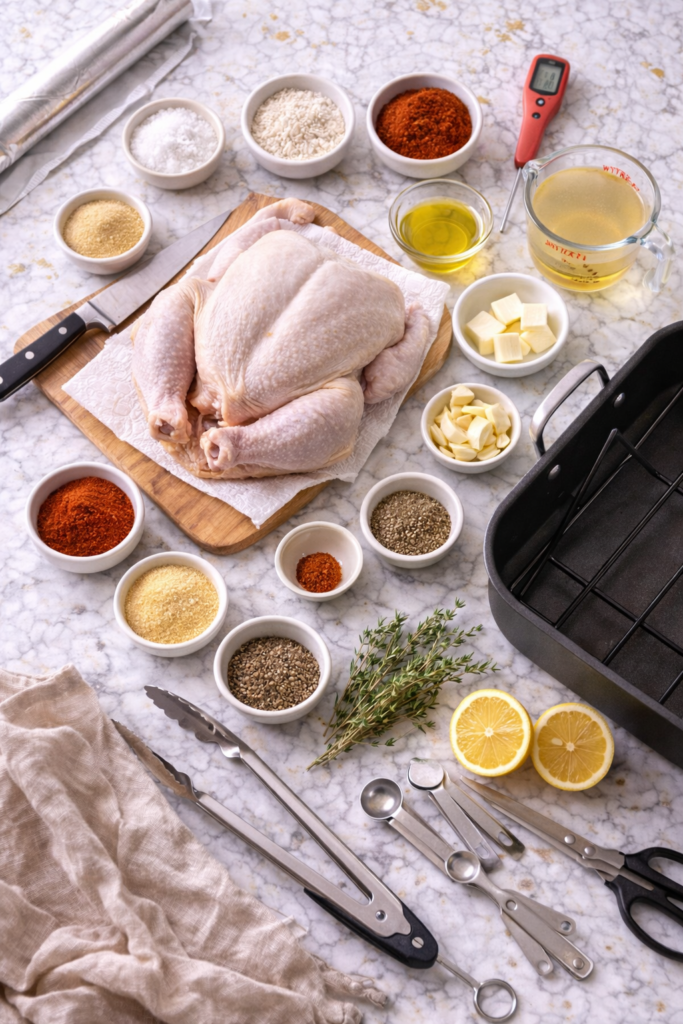
What You’ll Need
For the Chicken
- 1 whole chicken, 4 to 4.5 lbs (about 1.8 to 2kg)
- 3 tablespoons kosher salt
- 1 tablespoon granulated sugar
- 1 tablespoon smoked paprika
- 2 teaspoons garlic powder
- 2 teaspoons onion powder
- 1 teaspoon ground black pepper
- 1/2 teaspoon cayenne pepper (optional, for heat)
- 3 tablespoons neutral oil (vegetable or avocado)
- 2 tablespoons unsalted butter
- 4 cloves garlic, smashed
- 1 lemon, halved
- 4 sprigs fresh thyme
- 1 cup chicken broth (for the pan)
Tools You’ll Need
- One large roasting pan (at least 14 by 10 inches)
- Instant-read meat thermometer
- Paper towels
- Sharp chef’s knife and cutting board
- Small bowl for mixing the spice rub
- Tongs (the long kind, for rotating the chicken)
- Metal or wooden skewers (optional, for trussing)
- Meat kitchen shears (helpful but not essential)
- Measuring spoons and cups
- Aluminum foil
Pro Tips
1. Pat the chicken completely dry and let it sit overnight in the fridge.
This is where it all starts. Water is the enemy of crispy skin. A dry chicken in an uncovered container on the lowest shelf of your fridge draws moisture out through the skin overnight. The next day when you pull it out, the skin looks almost paper-thin. That’s exactly what you want. Yes, overnight is better than an hour. Yes, it matters.
2. Use the oven temperature trick: start hot, finish medium.
Preheat to 475°F (245°C) and roast at high heat for the first 20 minutes to shatter the skin. Then drop to 375°F (190°C) and finish low and slow. This gives you a golden crust without cooking the outside to leather while the thighs are still pink. The contrast is everything.
3. Stuff it, but don’t stuff it full.
Half a lemon, smashed garlic, and fresh thyme inside the cavity add flavor from the inside out, but don’t pack it tight. You want air to circulate. A crowded cavity steams the interior instead of roasting it. Loosely toss the lemon, garlic, and herbs in and call it a day.
4. Rotate the chicken halfway through the low heat phase.
Once you drop the heat to 375°F, rotate the pan 180 degrees at the midway point (around 40 minutes in). If your oven runs hot on one side, this keeps the skin from getting too dark. Takes five seconds and makes a real difference in how evenly golden everything turns out.
5. Let it rest for at least 15 minutes before cutting.
Do not skip this. The residual heat keeps cooking the meat inside while the juices redistribute. Cut into a hot chicken and all that moisture runs onto the cutting board instead of staying in the meat. Tent it loosely with foil and wait. It’s still hot, it’s still great, and it’s substantially juicier.
Make Ahead Tips
- The spice rub: Mix it the night before and store it in a small airtight container. This lets the flavors marry overnight.
- The whole chicken: Season and refrigerate uncovered up to 24 hours ahead. This is actually ideal. The longer it sits uncovered in the fridge, the better.
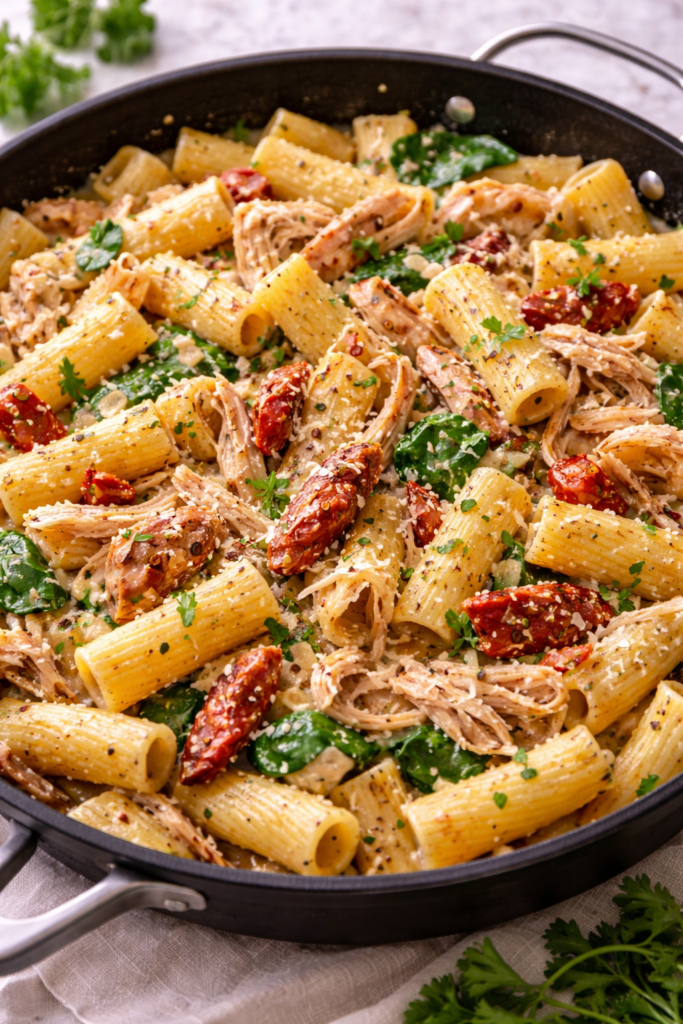
- The full chicken: Make it completely, let it cool, wrap it, and refrigerate for up to 3 days. Shred it and use it for salads, tacos, fried rice, or soup.
How to Make Crispy-Skin Rotisserie Chicken
Step 1: Prep the Chicken
- Remove the chicken from its package and place it in a colander. Rinse the inside and outside under cool water, patting dry with paper towels.
- Take the time here. Dry the skin, dry the thighs, dry inside the cavity. Soggy chicken makes soggy skin. If you’re doing this the night before, place the dry chicken on a plate lined with paper towels and refrigerate uncovered.
Step 2: Make the Spice Rub
- In a small bowl, combine kosher salt, sugar, smoked paprika, garlic powder, onion powder, black pepper, and cayenne (if using).
- The sugar might seem odd. It caramelizes during roasting and adds depth to the crust. Trust it.
Step 3: Season the Chicken
- Pat the chicken dry one more time if it’s been sitting. This is important.
- Rub 2 tablespoons of oil over the entire surface of the chicken, inside and out. Get under the wings, down the legs, everywhere.
- Sprinkle the spice rub all over, getting it into the crevices between the thighs and breast. Don’t be shy. Rub it in gently so it adheres to the oil.
- Place the smashed garlic cloves, lemon halves, and thyme sprigs loosely inside the cavity. Do not truss the legs or wings.
Step 4: Set Up Your Pan
- Place a large roasting pan in the oven and preheat to 475°F (245°C). The preheated pan matters because you want to hear a sizzle the moment the chicken hits it.
- While the oven preheats, rub the remaining 1 tablespoon of oil on the skin and sprinkle on any remaining spice rub.
- Once the oven is preheated, carefully place the chicken breast-side up in the center of the hot pan.
Step 5: The High Heat Roast
- Roast at 475°F for exactly 20 minutes. Don’t open the oven door. Don’t peek. Just let it sit.
- At 20 minutes, the skin will have started to turn golden and crisp. This is the Maillard reaction happening.
Step 6: The Low Heat Finish
- Lower the oven temperature to 375°F (190°C) and pour the chicken broth into the bottom of the pan (not over the chicken, around it).
- Roast for another 35 to 45 minutes. At around the 40-minute mark, rotate the pan 180 degrees.
- The chicken is done when the thickest part of the thigh registers 165°F (74°C) on an instant-read thermometer. This takes about 50 to 60 minutes total from when you started at high heat.
Step 7: Rest and Serve
- Transfer the chicken to a cutting board and tent loosely with foil. Let it rest for at least 15 minutes. This is when the magic happens inside.
- While it rests, spoon the pan drippings into a small saucepan and simmer over medium heat for 2 minutes if you want a simple pan sauce. Otherwise, just drizzle the pan juices over the carved chicken.
- Carve and serve. The skin should crackle when you cut into it.
Substitutions and Variations
| Original | Swap For | Notes |
|---|---|---|
| Smoked paprika | Regular paprika or ancho chili powder | Changes the flavor profile but works well |
| Kosher salt | Sea salt or table salt | Use slightly less table salt; it’s denser |
| Fresh thyme | Fresh rosemary or sage | More robust flavors that still pair beautifully |
| Lemon | Orange or lime halves | Adds different brightness to the cavity |
| Whole chicken | Spatchcock chicken | Cuts cooking time by 15 minutes; lay flat for even roasting |
For a simplified version, just use salt, pepper, and garlic powder. It’ll still be genuinely good.
Want it spicier? Add more cayenne or toss in a dried red chili.
Want it herbier? Double the fresh thyme and add sage to the cavity.
Nutritional Breakdown (Per Serving)
Based on 6 servings:
| Nutrient | Amount Per Serving |
|---|---|
| Calories | ~380 |
| Protein | ~42g |
| Fat | ~22g |
| Carbohydrates | ~1g |
| Fiber | 0g |
| Sodium | ~480mg |
Chicken is one of the leanest proteins you can cook. Most of the fat is in the skin, which you can remove if you’re watching fat intake. The dark meat (thighs and legs) has more flavor and slightly more fat than the white meat (breast).
What to Serve With It
- Simple roasted vegetables: potatoes, carrots, green beans (throw them in the pan with the chicken in the last 25 minutes)
- Fresh green salad with lemon vinaigrette
- Crusty bread to soak up the pan drippings
- Cauliflower rice or regular rice to catch the juices
- Dry white wine like Sauvignon Blanc or Pinot Grigio
Leftovers and Storage
- Fridge: Store the whole chicken or carved pieces in an airtight container for up to 4 days.
- Freezer: Wrapped tightly, the chicken (skin on or off) freezes well for up to 3 months.
- Reheating: Shred the meat and warm gently with a splash of broth on the stovetop over medium heat. If you want crispy skin again, place skin-side up on a baking sheet and heat at 375°F for 5 to 7 minutes.
- Shredding trick: Let the chicken cool slightly, then shred while still warm. It comes apart easier.
What to Make With Leftovers
- Chicken salad with mayo and herbs
- Fried rice with soy sauce, frozen peas, and scrambled egg
- Tacos with salsa, avocado, and lime
- Chicken noodle soup with the bones simmered for broth
- Nachos piled high with chicken, cheese, and jalapeños
FAQ
Can I truss the chicken?
You can, but you don’t need to. Trussing (tying the legs together) keeps the bird compact and helps it cook evenly, but it also traps steam under the wings and thighs. For maximum skin crispness, leave it untrussed.
What if the skin burns before the meat is done?
Your oven runs hot. Next time, lower the initial temperature to 450°F instead of 475°F, or tent the chicken loosely with foil after the first 25 minutes if the skin is darkening too fast.
Can I use a smaller or larger chicken?
Yes. Adjust the high-heat time: 15 minutes for a 3-lb bird, 25 minutes for a 5-lb bird. Low heat stays around 35 to 45 minutes depending on size. Use the thermometer, not the time, as your guide.
Is the food safety concern with resting the chicken?
No. The chicken reaches safe temperature (165°F) before you pull it from the oven. Resting doesn’t lower that temperature enough to create a food safety issue.
My skin isn’t crispy. What went wrong?
Either the oven temperature wasn’t high enough, the chicken wasn’t dry enough at the start, or you opened the oven door too much. Next time, use an oven thermometer to verify your temperature, pat it drier, and resist peeking.
Can I make this in a convection oven?
Yes. Reduce the temperature by 25°F (so start at 450°F instead of 475°F). Convection ovens circulate air more efficiently and brown faster.
What do I do with the bones?
Save them. Simmer in water with an onion, carrot, and celery for 2 hours to make the richest chicken broth for soup, rice, or gravy.
Wrapping Up
This chicken hits different once you understand why it works.
The dry-brine in the fridge breaks down the proteins and lets the skin render properly. The high heat shatters the exterior. The low heat finishes the meat without drying the breast. The rest lets everything relax and stay juicy.
It’s not magic. It’s just science and timing.
Make this one this week. Rotate that pan halfway through. Let it rest those 15 minutes. Then taste the difference between following a recipe and actually understanding what’s happening in your oven.
Drop a comment below and tell me how yours turned out. Did the skin get crispy? What did you serve it with? Any surprises along the way?
I love hearing what worked in your kitchen.