You know that moment when you take a bite of something and immediately think, why haven’t I been making this my entire life?
That’s this cake.
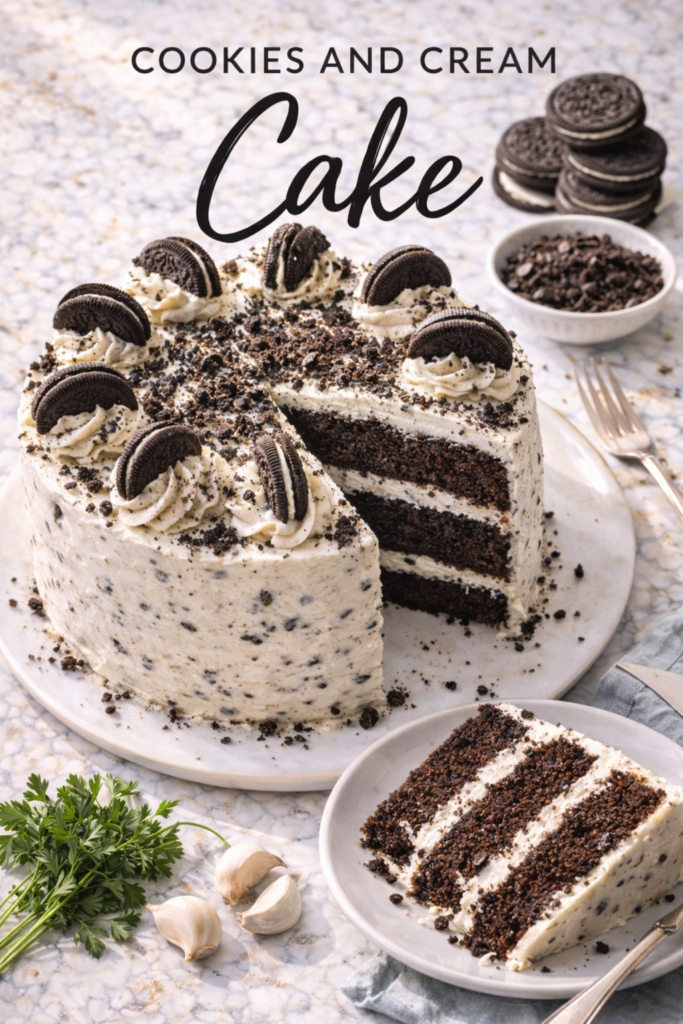
Cookies and cream cake isn’t just a dessert. It’s a full experience. Layers of moist chocolate cake, billowy Oreo buttercream, and crushed cookies tucked into every single bite. It looks like it came from a fancy bakery. It didn’t. You made it in your kitchen on a Tuesday.
And no, it’s not complicated. I promise you’ll feel like a total pro by the end.
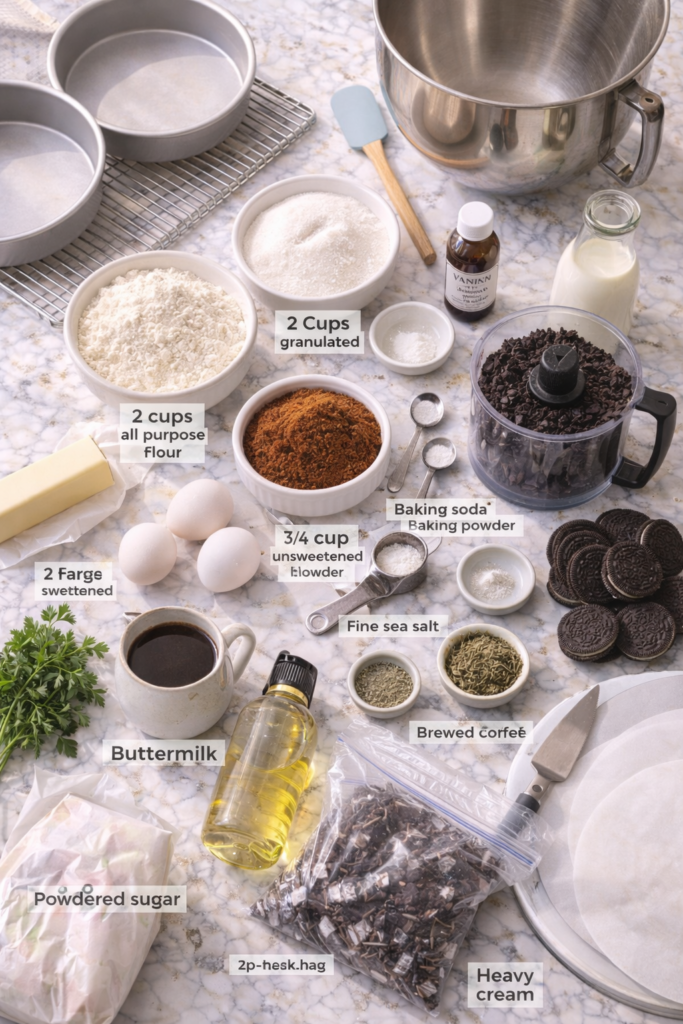
What You’ll Need
For the Chocolate Cake Layers
- 2 cups (250g) all-purpose flour
- 2 cups (400g) granulated white sugar
- ¾ cup (75g) unsweetened cocoa powder
- 2 tsp baking soda
- 1 tsp baking powder
- 1 tsp fine sea salt
- 2 large eggs, room temperature
- 1 cup (240ml) buttermilk, room temperature
- 1 cup (240ml) strong brewed black coffee, cooled
- ½ cup (120ml) vegetable oil
- 2 tsp pure vanilla extract
For the Oreo Buttercream
- 1½ cups (340g) unsalted butter, softened to room temperature
- 4 cups (480g) powdered sugar, sifted
- 3–4 tbsp heavy cream
- 1 tsp pure vanilla extract
- ¼ tsp fine sea salt
- 20 Oreo cookies, finely crushed (filling included)
For Assembly & Decoration
- 10–12 additional Oreo cookies, roughly crushed (for topping)
- 4–5 whole Oreo cookies (for decoration)
Tools You’ll Need
- Two 9-inch round cake pans
- Stand mixer or handheld electric mixer
- Large mixing bowl
- Medium mixing bowl
- Rubber spatula
- Offset spatula (for frosting)
- Cooling rack
- Food processor or zip-lock bag + rolling pin (for crushing Oreos)
- Parchment paper
- Cake turntable (optional but very helpful)
- Serrated knife (for leveling cake layers)
- Bench scraper (optional, for smooth frosting)
Pro Tips
These are the things I wish someone had told me the first time I made this cake.
- Cold butter = frosting disaster. Your butter needs to be genuinely room temperature before you start the buttercream. Not slightly soft. Room temp. If it’s still cold in the center, your frosting will be lumpy and no amount of mixing will fix it.
- Coffee is not optional. I know it sounds weird in a cake, but the coffee doesn’t make it taste like coffee. It deepens the chocolate flavor in a way that nothing else really replicates. Don’t skip it.
- Crush the Oreos fine for the frosting, rough for the topping. The frosting needs finely crushed cookies so it pipes and spreads smoothly. The topping is where you want bigger chunks for texture contrast. Two different textures, one incredible cake.
- Chill your layers before frosting. Pop your cooled cake layers in the fridge for 30 minutes before you frost. Cold cake = fewer crumbs in your frosting = cleaner finish.
- A crumb coat saves everything. Apply a thin layer of buttercream all over the cake first, refrigerate for 20 minutes, then do your final frosting layer. This is the difference between a messy cake and a beautiful one.
Substitutions and Variations
Not everyone is working with the same pantry. Here’s what you can swap out.
Buttermilk: Mix 1 cup of whole milk with 1 tbsp white vinegar. Let it sit for 5 minutes. Done.
Vegetable oil: Melted coconut oil or canola oil work just as well.
Coffee: Swap with hot water if you’re caffeine-sensitive. The cake will still be good, just slightly less rich.
Oreos: Any chocolate sandwich cookie works. Store-brand is totally fine here, no judgment.
Gluten-free version: Use a 1:1 gluten-free flour blend and gluten-free chocolate sandwich cookies. The texture will be slightly denser but still delicious.
Extra Oreo flavor: Add 2 tbsp of crushed Oreos into the cake batter itself for even more cookie flavor throughout.
Make Ahead Tips
This cake is actually better the next day. The flavors settle in, the frosting firms up, and every layer melds together perfectly.
- Cake layers can be baked up to 2 days ahead, wrapped tightly in plastic wrap, and stored at room temperature.
- Buttercream can be made up to 3 days ahead and stored in the fridge. Bring it fully to room temperature and re-whip before using.
- Fully frosted cake keeps well in the fridge for up to 3 days. Just cover it loosely so the frosting doesn’t dry out.
Nutritional Breakdown
Based on 12 servings:
| Nutrient | Per Slice |
|---|---|
| Calories | ~620 kcal |
| Fat | 31g |
| Carbohydrates | 82g |
| Sugar | 58g |
| Protein | 6g |
| Fiber | 2g |
This is not a diet cake. It’s a celebration cake. Enjoy it accordingly. 😄
Dietary Notes
- Dairy-free: Swap butter for vegan butter, buttermilk for oat milk + vinegar, and heavy cream for full-fat coconut cream.
- Egg-free: Use 2 flax eggs (2 tbsp flaxseed meal + 6 tbsp water, rested 10 minutes).
Meal Pairing
Serve with a scoop of vanilla ice cream or a glass of cold whole milk. Both are non-negotiable in my opinion.
How to Make It
Step 1: Prep Your Pans
Preheat your oven to 350°F (175°C). Grease both 9-inch cake pans with butter or cooking spray, line the bottoms with parchment paper, and grease again. Set aside.
Step 2: Mix the Dry Ingredients
In a large bowl, whisk together the flour, sugar, cocoa powder, baking soda, baking powder, and salt until combined.
Step 3: Mix the Wet Ingredients
In a separate bowl, whisk together the eggs, buttermilk, cooled coffee, vegetable oil, and vanilla extract.
Step 4: Combine
Pour the wet ingredients into the dry ingredients and whisk until just combined. Don’t overmix. A few lumps are perfectly fine and actually preferable.
The batter will be thin. That’s normal. Don’t second-guess it.
Step 5: Bake
Divide the batter evenly between your two prepared pans. Bake for 30–35 minutes, or until a toothpick inserted into the center comes out with just a few moist crumbs (not wet batter).
Let the cakes cool in the pans for 15 minutes, then transfer to a cooling rack. Cool completely before frosting. Completely.
Step 6: Make the Oreo Buttercream
Beat the softened butter on high speed for 3–4 minutes until it’s pale and fluffy. This step matters more than you’d think.
Add in the powdered sugar, one cup at a time, mixing on low until incorporated, then increasing to high.
Add the vanilla, salt, and 3 tbsp of heavy cream. Beat on high for 2 more minutes until light and fluffy. Add the final tablespoon of cream if the frosting is too thick.
Fold in the finely crushed Oreos with a rubber spatula.
Step 7: Level Your Cake Layers
Use a serrated knife to slice off any domed tops so your layers sit flat. This takes 10 seconds and makes a huge difference in the final look.
Step 8: Crumb Coat
Place one cake layer on your serving plate or cake board. Add a generous layer of buttercream on top and spread evenly.
Place the second cake layer on top, then apply a thin layer of buttercream all over the entire cake. Refrigerate for 20 minutes.
Step 9: Final Frosting
Apply the remaining buttercream generously to the top and sides. Use your offset spatula or bench scraper to smooth everything out.
Step 10: Decorate
Press the roughly crushed Oreos onto the top of the cake and arrange whole cookies around the edges. The more Oreos, the more dramatic the reveal when you slice it. Highly recommend going big here.
Refrigerate for at least 30 minutes before slicing for the cleanest cut.
Leftovers and Storage
- Room temperature: Up to 2 days, covered, in a cool kitchen.
- Refrigerator: Up to 5 days. Store in an airtight container or cover tightly with plastic wrap. Let slices come to room temperature for about 20 minutes before eating for the best texture.
- Freezer: Individual slices freeze beautifully. Wrap each one in plastic wrap, then foil. Freeze up to 3 months. Thaw in the fridge overnight.
One thing to note: the Oreos on top will soften over time in the fridge. If you want them to stay crunchy, add the decorative cookies right before serving.
FAQ
Can I make this as a sheet cake instead? Absolutely. Use a 9×13-inch pan and bake for 35–40 minutes. You’ll have plenty of buttercream to frost the top generously.
My buttercream looks curdled. What happened? Your butter was probably too cold, or you added the powdered sugar too fast. Keep beating on high speed for 3–4 more minutes. It almost always comes together. If it looks greasy, the butter may have been too warm. Pop the bowl in the fridge for 10–15 minutes, then beat again.
Can I use box cake mix? Yes. Use a box of chocolate cake mix and follow the package instructions, then use this homemade Oreo buttercream. It’s still a really great cake and cuts your time in half.
My cake came out dry. What went wrong? Two likely culprits: overbaking or inaccurate flour measurement. Always spoon flour into your measuring cup and level it off (don’t scoop directly from the bag, which packs it down). And pull the cake out as soon as the toothpick comes out with just a few moist crumbs.
How many people does this serve? 12 generous slices, or 16 if you’re cutting smaller pieces. It’s a tall, rich cake so slices go a long way.
Can I add a cookies and cream filling between the layers? Yes, and it’s a great idea. Mix ½ cup of the buttercream with extra crushed Oreos for a crunchier, more textured filling. Pipe a border around the edge of the bottom layer first to keep it from oozing out.
Wrapping Up
If you’ve been sitting on the fence about making a cake from scratch, this is the one to start with.
It’s forgiving. It comes together faster than you’d think. And the moment you slice into it and see those layers, you’ll genuinely feel proud of yourself. That part never gets old.
Give it a go this weekend, and then come back here and drop a comment below. I want to know how it turned out, any tweaks you made, and whether the Oreo buttercream is now your new favorite thing in the world. (It is. I know it is.)
Any questions before you start? Leave them below. 👇