You’ve seen it on menus. You’ve thought about ordering it. And then you second-guessed yourself and got something safe.
Stop doing that.
Chicken katsu curry is one of the most satisfying meals you can make at home — golden, panko-crusted chicken, a deeply savory Japanese curry sauce, and a pile of fluffy white rice to soak it all up.
And here’s what surprises most people: the curry sauce takes about 20 minutes. Not all day. Not some two-hour reduction. Twenty minutes, and it tastes like something a restaurant spent hours on.
Once you try it, takeout just won’t scratch the same itch.
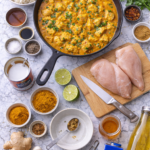
What You’ll Need
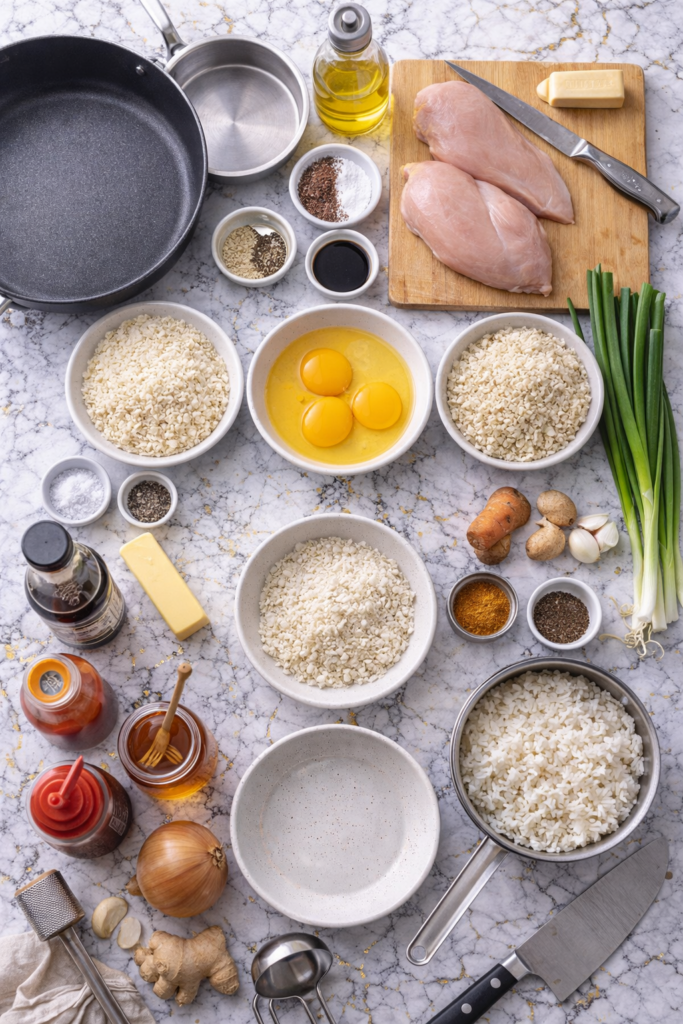
For the Chicken Katsu
- 2 large boneless, skinless chicken breasts
- 1 cup panko breadcrumbs
- ½ cup all-purpose flour
- 2 large eggs, beaten
- 1 tsp salt
- ½ tsp black pepper
- 1½ cups vegetable oil (for shallow frying)
For the Japanese Curry Sauce
- 2 tbsp unsalted butter
- 1 large onion, finely diced
- 3 garlic cloves, minced
- 1 tbsp fresh ginger, finely grated
- 2 tbsp Japanese curry powder (S&B brand is the gold standard)
- 1 tbsp garam masala
- 1 tbsp plain flour
- 2 cups chicken stock
- 1 tbsp soy sauce
- 1 tbsp honey
- 1 tbsp ketchup
- 1 medium carrot, finely grated
- Salt to taste
For Serving
- 2 cups cooked Japanese short-grain white rice (or jasmine rice)
- 2 spring onions, thinly sliced
- Pickled ginger (optional but genuinely adds a lot)
Tools You’ll Need
- Large, deep frying pan or wide saucepan (for frying the chicken)
- Medium saucepan (for the curry sauce)
- Meat mallet or rolling pin (to flatten the chicken)
- 3 shallow bowls (your breading station)
- Metal tongs
- Cooking thermometer (optional but takes the guesswork out)
- Sharp chef’s knife and cutting board
- Fine grater (for the ginger and carrot)
- Stick blender (optional, for a smoother sauce)
- Wire rack and baking tray (for resting the fried chicken)
- Ladle
Pro Tips
Here’s what nobody tells you when you first make this recipe:
- Pound the chicken flat. This is non-negotiable. Aim for about ¾ inch thickness throughout. Even thickness = even cooking = no raw middle with burnt edges.
- Use cold eggs straight from the fridge. Cold eggs make the coating stick better and give you a crispier crust. Pull them out right before you bread the chicken.
- Cook your onions slowly. Low heat, 10 to 12 minutes, until they’re soft and just starting to turn golden. This is the foundation of the sauce’s flavor. Rushing this step is the number one reason people end up with a flat-tasting curry.
- Oil temperature is everything. You want it at 350°F (175°C). Too hot and the outside burns before the chicken cooks. Too cool and you get greasy, limp breading. No thermometer? Drop a pinch of panko in. Immediate sizzle = you’re ready.
- Rest the chicken before you slice it. Two to three minutes on a wire rack. The juices redistribute, the crust stays crispy, and every slice is cleaner. Skip this and you’ll lose half your crunch.
Substitutions and Variations
This recipe is very easy to adapt.
For the protein:
- Pork loin cutlets are actually the traditional Japanese version — they work brilliantly here
- Boneless, skinless chicken thighs stay juicier and are harder to overcook (they’re very forgiving)
- Firm tofu (pressed and dried thoroughly) is a solid vegetarian swap
Going gluten-free:
- Use rice flour instead of all-purpose flour and grab gluten-free panko (it actually exists and works great)
- Swap regular soy sauce for tamari in the curry sauce
Using a curry roux block: S&B Golden Curry or Vermont Curry blocks are sold in most Asian grocery stores and are totally acceptable to use here. Follow the block’s water ratio and skip making the sauce from scratch. No judgment at all.
Want more heat: Add ½ tsp cayenne pepper or a teaspoon of chili flakes to the curry sauce while it simmers.
Make Ahead Tips
This is a great recipe to prep in stages.
- The curry sauce can be made up to 3 days ahead. Store it in the fridge in an airtight container. It genuinely tastes better the next day once the flavors have had time to settle.
- Breaded raw chicken can be kept on a rack in the fridge (uncovered) for up to 4 hours before frying. The panko dries out slightly and gets even crispier.
- Cooked rice can be made ahead and reheated with a small splash of water.
The only step you really can’t do ahead is frying. That needs to happen right before you eat.

How to Make Chicken Katsu Curry
Step 1: Make the Curry Sauce
Melt the butter in a medium saucepan over medium-low heat.
Add the diced onion and cook, stirring occasionally, for 10 to 12 minutes until very soft and lightly golden. Give it the time it needs.
Add the garlic and grated ginger. Stir and cook for 1 minute until fragrant.
Add the curry powder and garam masala. Stir constantly for about 30 seconds — this toasts the spices slightly and makes a noticeable difference to the finished flavor.
Add the flour and stir until it forms a paste with the spices.
Pour in the chicken stock slowly, a little at a time, stirring constantly so it doesn’t clump.
Add the soy sauce, honey, ketchup, and grated carrot. Stir everything together.
Let it simmer on low heat for 10 to 15 minutes, stirring occasionally, until it thickens slightly. Taste it and season with salt.
For a smoother sauce, use a stick blender directly in the pan. This step is optional but makes the texture noticeably silkier.
Step 2: Bread the Chicken
Place each chicken breast between two sheets of plastic wrap or in a zip-lock bag.
Pound to an even ¾-inch thickness using a meat mallet or the bottom of a rolling pin.
Season both sides generously with salt and black pepper.
Set up your three bowls in a line: flour in bowl one, beaten eggs in bowl two, panko in bowl three.
Coat each breast in flour first (shake off the excess), then dip into the egg, then press firmly into the panko. Make sure the coating is even and thorough — press the panko on so it actually sticks.
Step 3: Fry the Chicken
Pour 1 to 1½ inches of vegetable oil into your frying pan. Heat to 350°F (175°C).
Carefully lower the breaded chicken into the oil. Fry for 4 to 5 minutes per side until deep golden brown. The internal temperature should reach 165°F (74°C).
Transfer to a wire rack and let rest for 2 to 3 minutes before slicing.
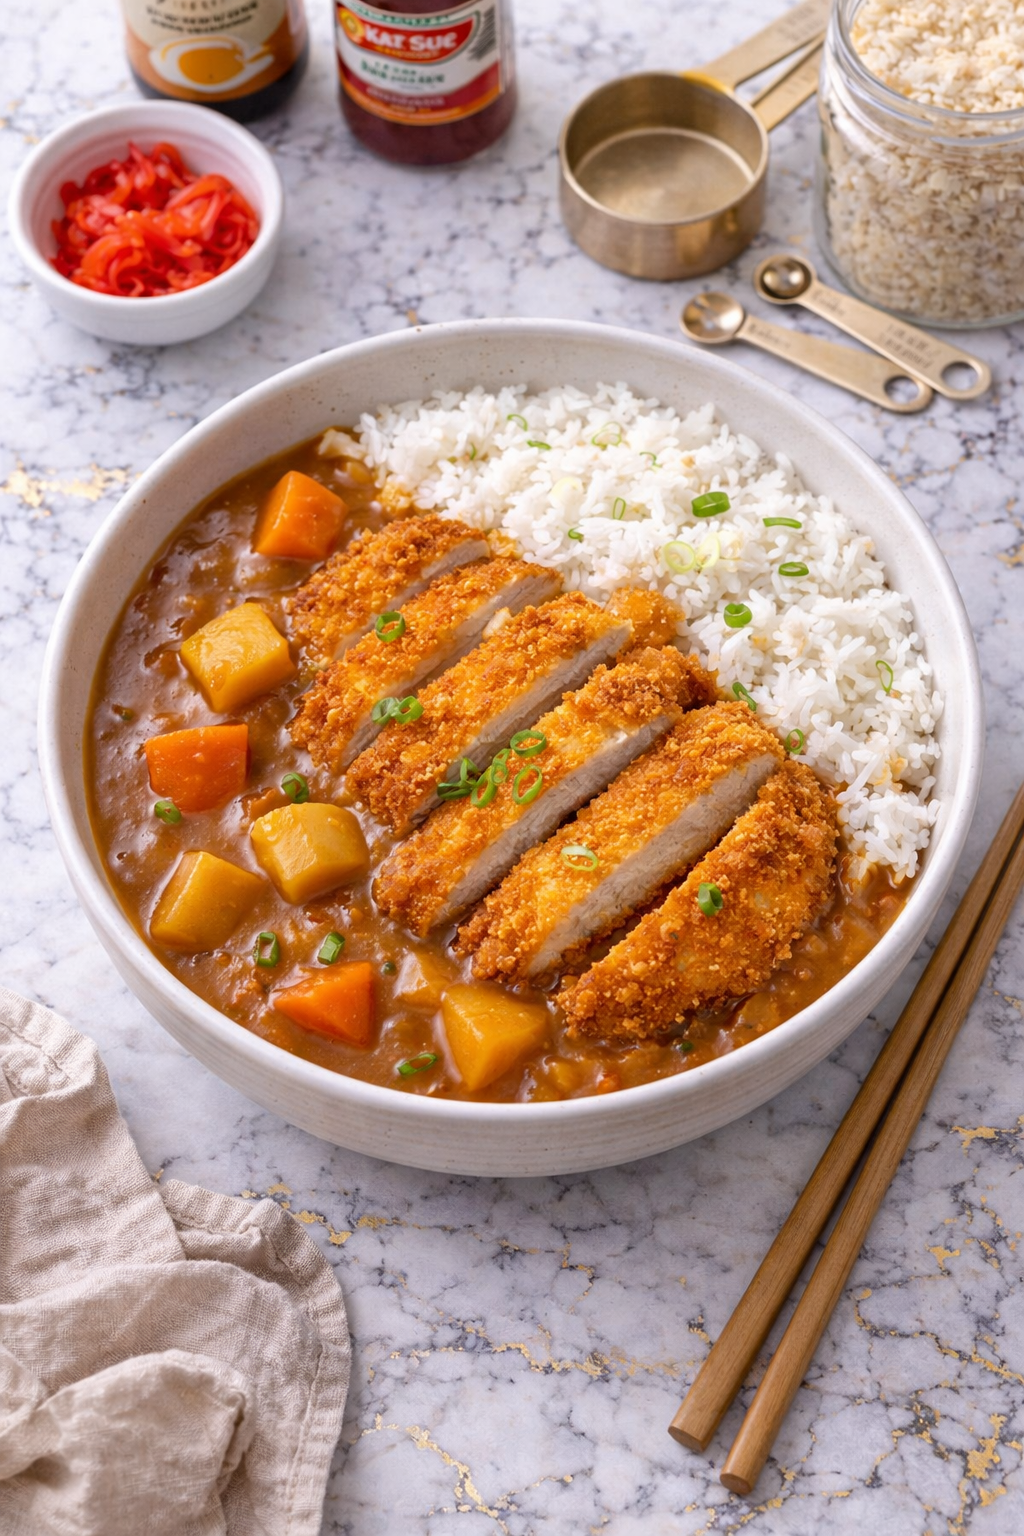
Step 4: Assemble and Serve
Slice the chicken diagonally into strips.
Plate with a scoop of rice, lay the sliced chicken over or beside it, and ladle the curry sauce generously over the top.
Finish with sliced spring onions and pickled ginger if you’re using it.
Nutritional Breakdown (Per Serving)
| Amount | |
|---|---|
| Calories | ~620 kcal |
| Protein | 42g |
| Carbohydrates | 58g |
| Fat | 22g |
| Fiber | 3g |
| Sodium | ~980mg |
Values are approximate and vary based on oil absorption and portion size.
For a lighter option: Spray the breaded chicken with cooking oil spray and bake at 400°F (200°C) for 20 to 22 minutes, flipping once halfway through. It won’t be quite as crunchy, but it’s still genuinely good once covered in that sauce.
Good pairings if you want a fuller meal:
- Miso soup on the side (literally 5 minutes to make)
- Quick cucumber salad with rice vinegar and sesame oil
- Edamame to start
- Japanese pickles (tsukemono) for something tangy alongside
Leftovers and Storage
Curry sauce: Refrigerate in an airtight container for up to 4 days. Freezes well for up to 3 months.
Cooked chicken: Store separately from the sauce for up to 3 days in the fridge. Reheat in an oven or air fryer at 375°F to bring back some crispiness. The microwave turns it soft, so use it as a last resort.
Rice: Refrigerate separately for up to 3 days. Reheat with a splash of water.
One important note: Don’t store sliced chicken in the curry sauce overnight. The breading absorbs the liquid and goes completely soft. Keep them separate until you’re ready to eat.
FAQ
Can I use chicken thighs instead of breasts?
Yes, and honestly they’re even more forgiving. Boneless, skinless thighs stay juicier. They’ll need an extra 1 to 2 minutes of frying time.
My curry sauce came out too thin. What do I do?
Just keep simmering it uncovered and it’ll thicken. Or mix 1 tsp of cornstarch with 1 tbsp cold water, stir it in, and give it 2 more minutes on low heat.
Is Japanese curry the same as Indian curry?
Not at all — and this surprises a lot of people. Japanese curry is milder, slightly sweet, and has a thick, gravy-like consistency. It’s a completely different flavor experience.
What’s the best rice to use?
Japanese short-grain rice gives you that slightly sticky, soft texture that’s traditional. Jasmine rice is a great second option and easy to find anywhere.
Can I make this dairy-free?
Yes. Use vegetable oil instead of butter in the curry sauce. Everything else in the recipe is already dairy-free.
Can I make this for a bigger group?
Double everything and fry the chicken in batches. Keep fried pieces warm on a rack in a 200°F oven while you finish the rest.
Wrapping Up
Chicken katsu curry is one of those meals that earns a permanent spot in your regular rotation.
The crunch of that golden panko crust against the warm, savory curry sauce is a combination that just works — every single time. It looks like a restaurant meal, tastes like one too, and you made it in about 40 minutes.
Give it a go this week. And when you do, come back and drop a comment below — tell me how it went, what you changed, or any questions that came up along the way. I read every single one.