His birthday rolls around and you’re staring at a blank grocery list wondering if store-bought is really the move.
But here’s the thing: a homemade cake from you hits different. It’s the difference between a nice gesture and something he actually remembers.
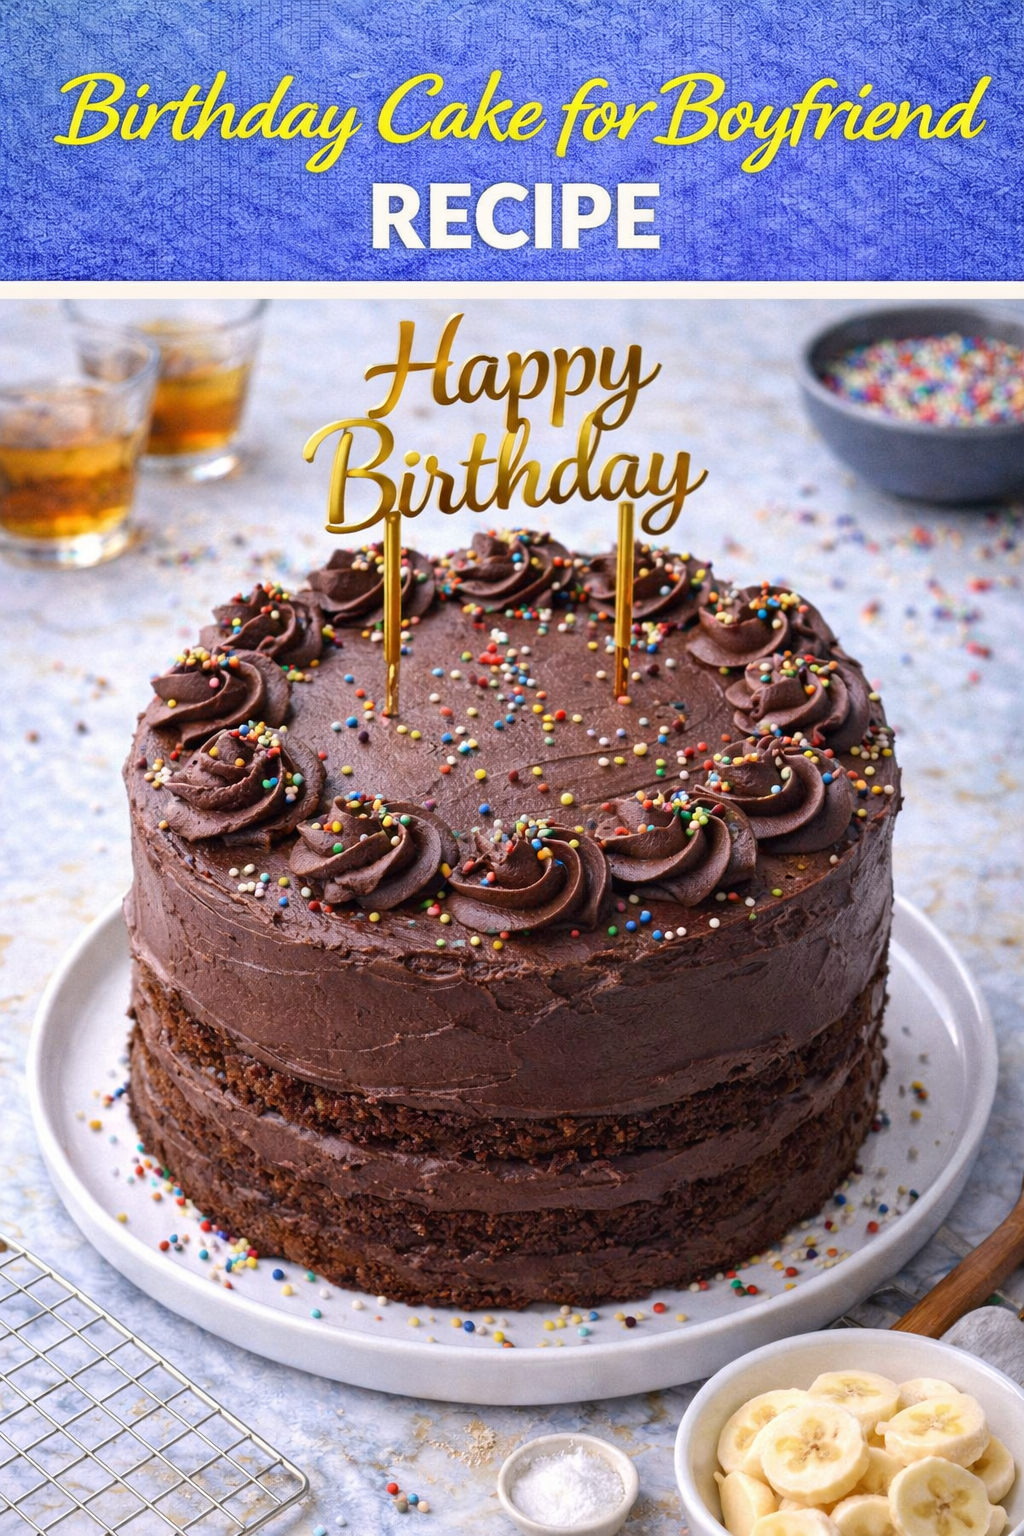
This isn’t some fussy three-tier showstopper that requires piping skills you don’t have. It’s a rich, deeply chocolatey cake with a silky frosting that somehow tastes like you spent all day on it, when really you managed the whole thing in under two hours.
The chocolate is bold without being bitter. The frosting is smooth enough to make you question whether you actually made it yourself. And the whole cake comes together with techniques that actually work, not tricks that only succeed if you have a baking degree.
This is the kind of cake that makes him cut into it slowly, take that first bite, and get quiet for a second.
What You’ll Need
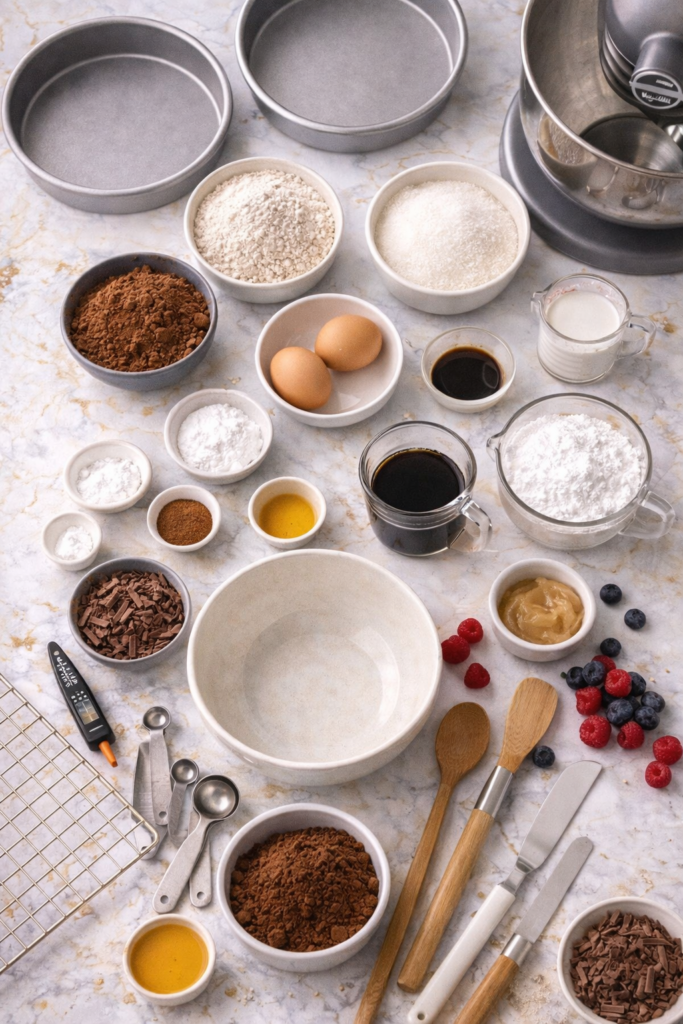
For the Cake
- 2 cups all-purpose flour
- 1 3/4 cups granulated sugar
- 3/4 cup unsweetened cocoa powder
- 2 teaspoons baking soda
- 1 teaspoon baking powder
- 1 teaspoon salt
- 2 eggs (room temperature, this matters)
- 1 cup strong brewed coffee (or hot water, cooled slightly)
- 1/2 cup neutral oil (vegetable or canola)
- 1 teaspoon vanilla extract
- 1/2 cup buttermilk (or milk with 1 tablespoon lemon juice)
For the Frosting
- 1 cup unsalted butter (room temperature)
- 2/3 cup unsweetened cocoa powder
- 3 cups powdered sugar
- 1/4 cup heavy cream (or milk)
- 1 teaspoon vanilla extract
- Pinch of salt
Optional (But Worth It)
- 1/4 cup strong coffee (to brush between layers, for flavor depth)
- Chocolate shavings for decoration
- Fresh berries if you want to keep it elegant
Tools You’ll Need
- Two 8-inch round cake pans
- Parchment paper
- Stand mixer or hand mixer
- Large mixing bowls
- Measuring cups and spoons
- Wooden spoon or silicone spatula
- Whisk
- Offset spatula or butter knife
- Cake leveler (optional but useful)
- Cooling racks
- Instant-read thermometer (to check doneness)
Pro Tips
1. Room temperature everything for the frosting. Cold butter won’t whip properly, and you’ll end up with a grainy, broken frosting instead of that silky finish you’re after. Pull butter out at least an hour before, or cut it into pieces and let it sit for 20 minutes.
2. Use coffee in the cake batter, not just hot water. The coffee doesn’t make it taste like coffee, it amplifies the chocolate flavor to another level. One cup of strong brewed (or instant dissolved in hot water) is your secret weapon here.
3. Don’t skip the buttermilk. It adds tang that balances the sweetness and creates a more tender crumb. If you don’t have it, make it by adding a tablespoon of lemon juice or vinegar to regular milk and letting it sit for five minutes.
4. Let the cakes cool completely before frosting. Warm cake + frosting equals a melted, sliding disaster. Set them on cooling racks for at least an hour, or stick them in the fridge for 20 minutes if you’re in a hurry.
5. Level your cake layers if they dome on top. A serrated knife or cake leveler makes this easy and gives you flat layers that stack perfectly. Uneven cakes look wobbly no matter how good the frosting is.
Substitutions and Variations
| Original | Swap For | Notes |
|---|---|---|
| Buttermilk | Greek yogurt | Same amount, adds slight tang |
| Coffee | Hot water | Works fine, chocolate flavor less intense |
| Cocoa powder | Dutch-process cocoa | Darker, slightly less bitter result |
| All oil | Half oil, half melted butter | Richer flavor, slightly denser cake |
| Milk frosting | Sour cream | Tangier frosting, cuts sweetness |
| Powdered sugar | Coconut sugar | Frosting will be slightly grainier |
If he has dietary restrictions, you can make this gluten-free by swapping the flour for a 1:1 baking blend, and dairy-free by using coconut oil instead of butter and oat milk instead of cream.
Make Ahead Tips
- The cakes: Bake them up to 2 days ahead. Wrap each layer tightly in plastic wrap and store at room temperature or in the fridge.
- The frosting: Make it the morning of and store in the fridge in an airtight container. Let it come to room temperature before spreading.
- Assembled cake: Frost it up to 8 hours ahead. Keep it in a cool room or the fridge so the frosting stays firm.
How to Make It
Step 1: Prepare
Preheat your oven to 350°F (175°C).
Line two 8-inch round cake pans with parchment paper. This prevents sticking and makes removal way easier.
Whisk together flour, sugar, cocoa powder, baking soda, baking powder, and salt in a large bowl. Set aside.
Step 2: Mix the Batter
In another bowl, whisk together eggs, coffee, oil, vanilla, and buttermilk until combined.
Pour the wet ingredients into the dry ingredients and stir until just combined. Don’t overmix; a few lumps are fine and they’ll smooth out in the oven.
Divide the batter evenly between the prepared pans and smooth the tops.
Step 3: Bake
Bake for 30 to 35 minutes, until a toothpick inserted in the center comes out with just a few moist crumbs (not wet batter, but not completely clean either).
Let cool in the pans for 10 minutes, then turn out onto cooling racks.
Let them cool completely, at least one hour.
Step 4: Make the Frosting
Beat room temperature butter on medium speed for about 2 minutes until pale and creamy.
Sift in cocoa powder and beat until combined.
Add powdered sugar one cup at a time, beating on low speed after each addition to prevent a cocoa cloud.
Once all powdered sugar is in, add heavy cream and vanilla plus the pinch of salt.
Beat on medium-high speed for 2 to 3 minutes until the frosting is light, fluffy, and spreadable.
Step 5: Assemble
Place one cake layer on your serving plate or cake stand.
If using the coffee brush, lightly brush the top of the first layer with strong coffee.
Spread a thick layer of frosting on top (about 1/2 cup).
Place the second cake layer on top.
Frost the top and sides with the remaining frosting. Take your time here; messy frosting is part of the charm, but smoother looks more intentional.
Step 6: Decorate
Add chocolate shavings on top, fresh berries if you’re going that direction, or just leave it simple.
Let it sit for 30 minutes before slicing so the frosting sets.

Nutritional Breakdown
Based on 12 servings:
| Nutrient | Amount Per Serving |
|---|---|
| Calories | ~420 |
| Protein | ~4g |
| Carbohydrates | ~58g |
| Fat | ~19g |
| Fiber | ~2g |
| Sugar | ~50g |
This is a proper dessert, not a health food. The joy you see on his face is the real nutrition here.
What to Serve With It
- Coffee or espresso (obviously)
- Cold milk because it never gets old
- Vanilla ice cream if you want to make him actually speechless
- A simple side salad earlier in the meal keeps things balanced
Leftovers and Storage
- Room temperature: Covered, for up to 2 days (if it lasts that long)
- Fridge: Up to 5 days in an airtight container
- Freezer: Wrapped tightly, the unfrosted cake layers last up to 3 months. Frosted cake doesn’t freeze as well because the frosting gets weird on thawing.
If you’re reheating from the fridge, pull it out 30 minutes before serving so the frosting softens back to that silky texture.
FAQ
Can I use a boxed mix? Sure, no judgment, but this recipe is easier than you think and the taste difference is significant. If you go that route, just use the frosting from here because it’s the real differentiator.
My frosting is too soft or too hard. Too soft: chill it for 10 minutes and try again, or add more powdered sugar. Too hard: add cream one tablespoon at a time and beat until it’s spreadable.
Can I make cupcakes instead? Yes. Fill cupcake liners and bake for 18 to 22 minutes. The frosting amounts are the same, just makes more cupcakes.
What if my cake layers crack? That’s what frosting is for. No one sees cracks once it’s frosted. If it’s a major break, just piece it together and frosting hides everything.
Is this cake good for stacking and decorating? This recipe is stable enough for a two-layer cake like described here. If you want to go bigger or do fancy decorations, you might need to add a little more cocoa to make it sturdier.
Can I make this dairy-free? Use coconut oil instead of butter (same amount) and a coconut or oat milk mixed with coconut cream for the heavy cream. The frosting will be slightly different in texture but still delicious.
Why did my cake sink in the middle? Either the oven temperature was off or you opened the door too early. Some sinking is normal but a major crater means either issue happened. An oven thermometer helps fix this next time.
Wrapping Up
This cake becomes the thing he talks about for weeks.
Not because it’s complicated or shows off some technique you spent hours mastering. But because someone he loves spent the afternoon making something that tastes like it actually took skill, and then showed up with it on his birthday.
That matters. He’ll know it mattered.
The chocolate is bold, the frosting is silky, and the whole thing sits on the line between impressive and achievable, which is exactly where the best food lives.
Make this for his next birthday. Or for no reason at all. Just make it.
Then drop a comment and tell me how it went. Did you nail the frosting? What did he say when he tasted it? Any changes you made? I want to hear about it.