You know that dessert everyone fights over at family gatherings?
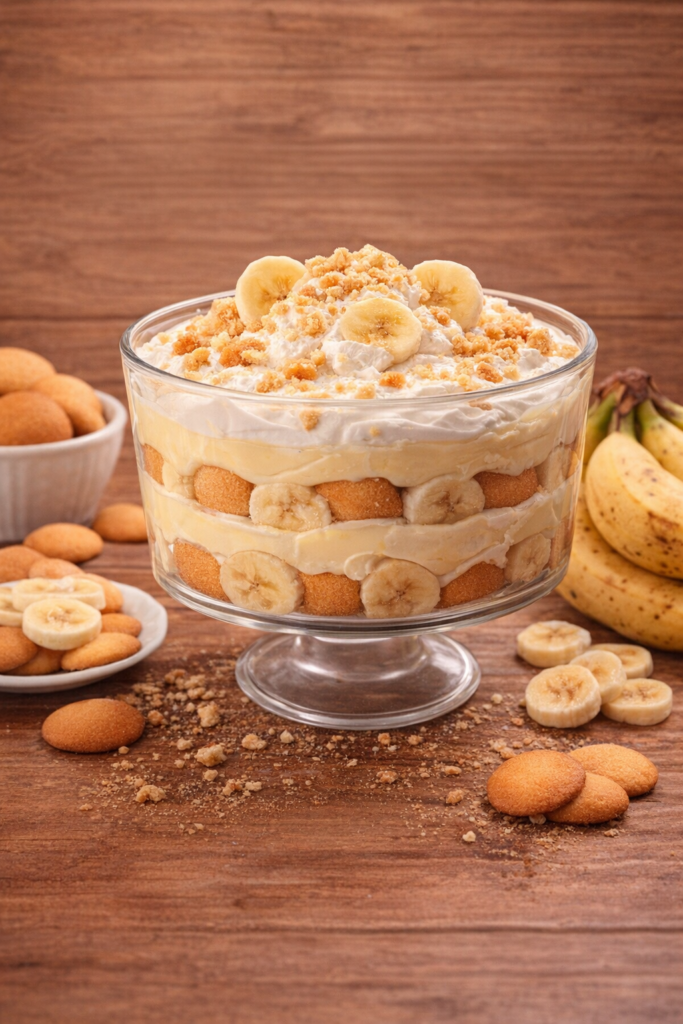
The one with creamy vanilla pudding, fresh bananas, and those impossibly crunchy vanilla wafers that somehow stay crispy even after soaking up all that goodness?
I’m talking about banana pudding. And after making this about fifty times (not exaggerating), I can tell you this recipe is the one you’ll be making on repeat.
I grew up eating store-bought banana pudding from those plastic containers. And while those were fine, they don’t even come close to homemade.
The first time I made this from scratch, I couldn’t believe how much better it tasted. The pudding was richer, the bananas were fresher, and the whole thing just had this homemade quality that you can’t buy in a store.
So if you’ve been curious about making your own or you just want a dessert that’ll make everyone ask for seconds, you’re in the right place.
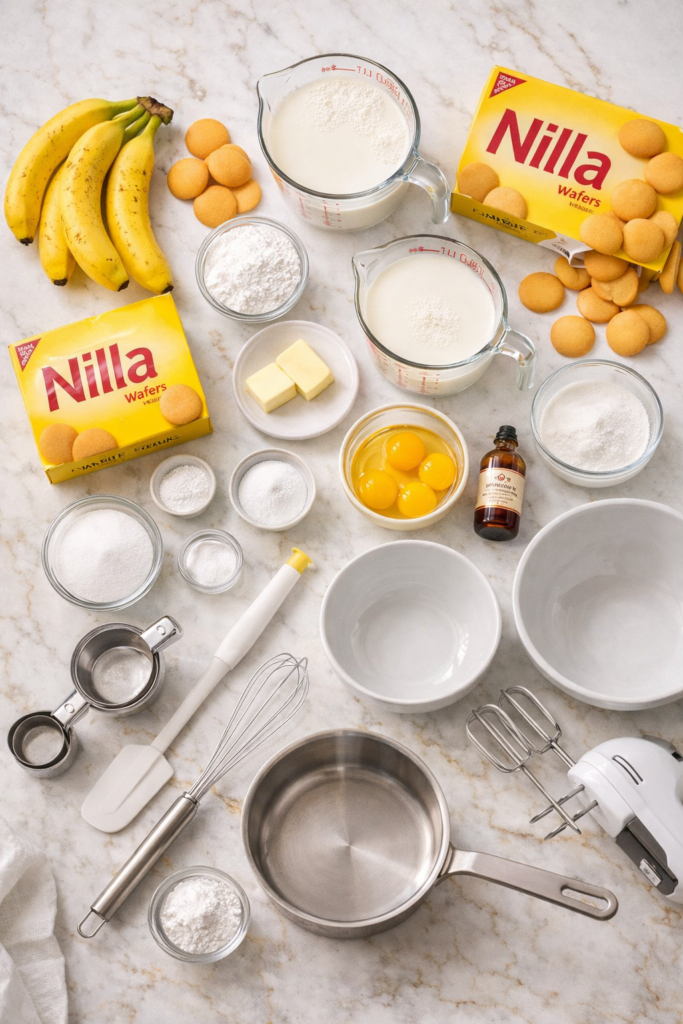
What You’ll Need
For the Vanilla Pudding:
- 3/4 cup granulated sugar
- 1/3 cup all-purpose flour
- 1/4 teaspoon salt
- 3 cups whole milk
- 4 large egg yolks
- 2 tablespoons unsalted butter
- 2 teaspoons pure vanilla extract
For Assembly:
- 4-5 ripe bananas (medium to large)
- 1 box (11 oz) vanilla wafer cookies
- 2 cups heavy whipping cream
- 3 tablespoons powdered sugar
- 1 teaspoon vanilla extract
Tools You’ll Need
You don’t need anything fancy here.
- Medium saucepan
- Whisk
- Mixing bowls (at least 2)
- Electric mixer or stand mixer
- 9×13 inch baking dish (or trifle dish if you want to get fancy)
- Rubber spatula
- Measuring cups and spoons
Pro Tips
Get your bananas right. You want them ripe but not mushy. If they’re too green, they’ll taste starchy and weird. If they’re too brown, they’ll turn to mush. Look for bananas that are yellow with just a few brown spots.
Don’t skip the homemade pudding. I know boxed pudding mix is easier, but trust me on this. The homemade version tastes completely different. It’s creamier, richer, and has this actual vanilla flavor that the boxed stuff just can’t match.
Layer while the pudding is warm. This is key. When you layer everything together while the pudding is still warm, it helps the wafers soften just enough without getting completely soggy. You want them to have some texture still.
Chill it long enough. I know it’s tempting to dig in right away, but banana pudding needs at least 4 hours in the fridge (overnight is even better). This gives all the flavors time to come together and lets the wafers reach that perfect texture.
Use real whipped cream. Skip the Cool Whip for this one. Fresh whipped cream tastes so much better and it only takes like 3 minutes to make.
How to Make Banana Pudding
Make the pudding first.
In your saucepan, whisk together the sugar, flour, and salt. Then slowly pour in the milk while whisking constantly. You don’t want any lumps here.
Put the pan over medium heat and keep whisking. It’ll take about 8-10 minutes for the mixture to thicken. You’ll know it’s ready when it coats the back of a spoon and you can draw a line through it with your finger.
Temper the eggs.
This sounds fancy but it’s actually super simple. In a separate bowl, whisk your egg yolks. Then take about 1 cup of your hot pudding mixture and slowly pour it into the yolks while whisking constantly.
This warms up the yolks without scrambling them. I learned this the hard way when I made scrambled egg pudding once (not good).
Pour the egg mixture back into the saucepan with the rest of the pudding. Cook for another 2 minutes, whisking constantly.
Finish the pudding.
Take the pan off the heat and stir in the butter and vanilla. The butter makes everything even creamier and that vanilla extract is what gives it that classic pudding flavor.
Cover the pudding with plastic wrap, pressing it directly onto the surface. This prevents a skin from forming. Let it cool for about 10 minutes while you prep everything else.
Slice the bananas.
Cut them into rounds about 1/4 inch thick. Some people like to toss them with a little lemon juice to prevent browning, but honestly if you’re assembling and serving within 24 hours, it’s not necessary.
Start layering.
Spread a thin layer of warm pudding on the bottom of your dish. Then add a layer of vanilla wafers (I usually break some in half to fill in gaps). Top with a layer of banana slices, then another layer of pudding.
Repeat this process until you’ve used up all your pudding. I usually get about 3 layers total. Make sure your top layer is pudding.
Make the whipped cream.
In a clean bowl, beat the heavy cream with an electric mixer on medium-high speed until it starts to thicken. Add the powdered sugar and vanilla, then keep beating until you get stiff peaks.
This takes about 3-4 minutes total. You’ll know it’s ready when you can turn the whisk upside down and the cream holds its shape.
Top and chill.
Spread the whipped cream over the top of your pudding. You can get creative here and pipe it on if you want it to look fancy, but I usually just spread it with a spatula.
Crush a few extra vanilla wafers and sprinkle them on top. This gives it a nice crunch and makes it look finished.
Cover the whole thing with plastic wrap and refrigerate for at least 4 hours. Overnight is even better because it gives everything time to set and the flavors really come together.
Substitutions and Variations
Make it chocolate. Add 1/4 cup cocoa powder to the pudding mixture and use chocolate wafers instead of vanilla ones. It’s a completely different vibe but just as good.
Try Chessmen cookies. These are a popular swap for vanilla wafers. They’re a little more buttery and have a different texture, but they work great.
Go with Nilla Wafers. I know some people are really specific about using the name brand. Either works fine, but Nilla Wafers do have a slightly different flavor.
Skip the homemade whipped cream. If you’re really pressed for time, you can use Cool Whip. It’s not my favorite but the dessert will still taste good.
Add some rum. A tablespoon or two of dark rum in the pudding gives it this amazing depth. This is more of an adults-only version though.
Use coconut milk. If you’re dairy-free, you can make the pudding with full-fat coconut milk. The texture won’t be exactly the same but it still works.
Make Ahead Tips
This is actually a perfect make-ahead dessert.
You can make the pudding up to 2 days in advance. Just keep it covered in the fridge until you’re ready to assemble.
The fully assembled banana pudding is best within 24 hours, but it’ll keep for up to 3 days in the fridge. Just know that the bananas might brown a little and the wafers will get softer the longer it sits.
If you’re making it for a party, I usually assemble it the night before. That way everything has time to set but the bananas are still fresh.
Nutrition Info
Per serving (based on 12 servings):
- Calories: 385
- Fat: 18g
- Carbohydrates: 51g
- Protein: 5g
- Sugar: 35g
Pairing Suggestions
Banana pudding is pretty rich, so I like to serve it after lighter meals.
It goes great after grilled chicken, fish tacos, or really any summer BBQ food. The cool, creamy texture is perfect when it’s hot outside.
If you’re doing a full Southern spread, serve it alongside fried chicken, collard greens, and cornbread. That’s the classic pairing and it works for a reason.
Coffee is my go-to drink with this. The bitter coffee balances out all that sweetness.
Leftovers and Storage
Keep any leftover banana pudding covered in the fridge. It’ll stay good for about 3 days.
The texture changes a bit over time. The wafers get softer and the bananas might brown, but it still tastes good.
I don’t recommend freezing banana pudding. The texture gets weird when you thaw it and the bananas turn brown and mushy.
If you have a lot left over, you can scoop individual portions into small containers. This makes it easy to grab for a quick dessert or midnight snack (no judgment).
FAQ
Can I use instant pudding instead?
You can, but the texture and flavor won’t be the same. Instant pudding has stabilizers and a different consistency. If you’re really short on time, use 2 boxes of instant vanilla pudding and follow the package directions, but I really recommend making it from scratch at least once.
Why is my pudding lumpy?
This usually happens if you don’t whisk constantly while cooking or if you add the milk too fast at the beginning. To fix lumpy pudding, pour it through a fine-mesh strainer before assembling.
Do I have to use vanilla wafers?
Vanilla wafers are traditional, but you can use graham crackers or even shortbread cookies. The texture will be different but it’ll still taste good.
How do I keep the bananas from turning brown?
The pudding and whipped cream actually protect them pretty well. If you’re really worried, you can brush them with a little lemon juice, but I usually skip this step.
Can I make this in a trifle dish?
Yes! It looks really pretty in a clear trifle bowl because you can see all the layers. Just layer everything the same way you would in a regular baking dish.
What if I don’t have heavy cream?
You could use Cool Whip instead of making fresh whipped cream. Or you can make whipped cream with evaporated milk (chill a can in the fridge for a few hours, then whip it with some sugar).
How long does banana pudding need to chill?
At least 4 hours, but overnight is better. This gives the wafers time to soften and all the flavors to blend together.
Wrapping Up
Banana pudding is one of those desserts that looks impressive but is actually pretty simple to make.
And once you try it homemade, you’ll get why people lose their minds over this stuff.
The creamy vanilla pudding, fresh bananas, crunchy wafers, and that cloud of whipped cream on top just work together in the best way possible.
So grab your ingredients and make this happen. Your friends and family will thank you.
And when you do make it, come back and tell me how it turned out. Did you make any changes? Did everyone fight over the last serving? I want to hear all about it in the comments below.