Your bananas are turning brown on the counter and you know what that means.
Time to make banana bread that’ll have your kitchen smelling like a cozy bakery and your family asking for seconds before they’ve even finished their first slice.
I’ve been making banana bread for years, and I can tell you right now that this recipe is the one I always come back to. It’s moist without being dense, sweet without being cloying, and has just the right amount of walnuts to make every bite interesting.
And the thing is, banana bread gets a bad rap for being “just okay” or too dry. But when you nail the ratios and don’t overmix the batter, you end up with something that’s genuinely crave-worthy.
This isn’t one of those recipes where you need fancy equipment or hard-to-find ingredients. Just overripe bananas, pantry staples, and about an hour of your time.
Let’s get into it.
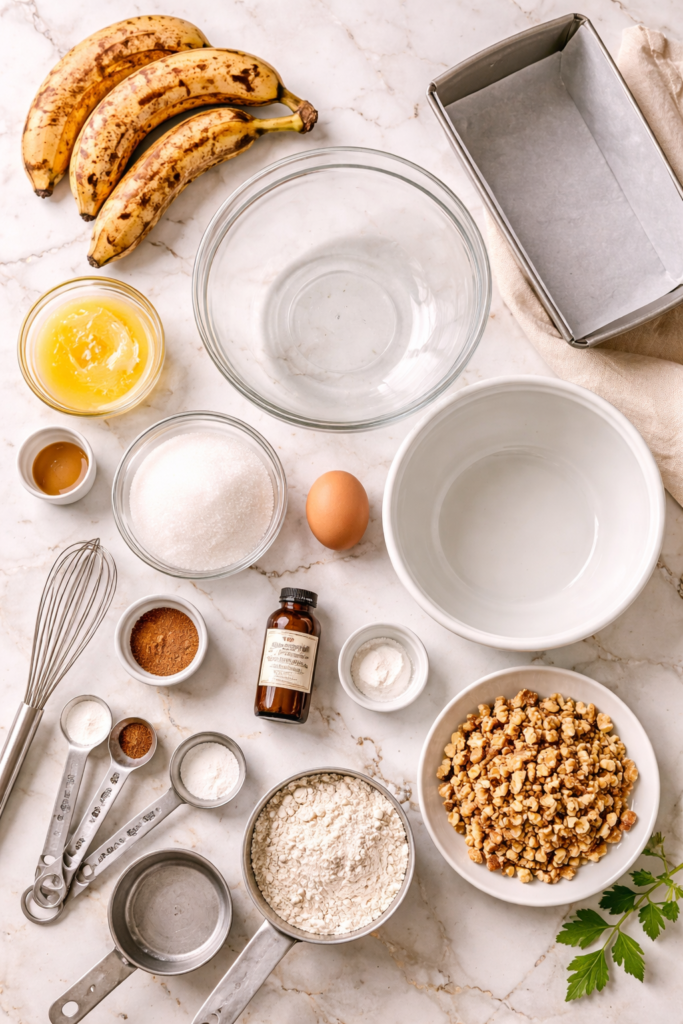
What You’ll Need
For the bread:
- 3 large overripe bananas (the browner, the better)
- 1/3 cup melted butter (or coconut oil if you prefer)
- 3/4 cup granulated sugar
- 1 large egg (beaten)
- 1 teaspoon vanilla extract
- 1 teaspoon baking soda
- 1/4 teaspoon salt
- 1 1/2 cups all-purpose flour
- 1 cup chopped walnuts (or pecans)
- 1/2 teaspoon ground cinnamon (optional but recommended)
Tools you’ll need:
- 9×5 inch loaf pan
- Mixing bowls (2)
- Fork or potato masher
- Whisk or wooden spoon
- Measuring cups and spoons
- Parchment paper or cooking spray
Pro Tips
Use the ugliest bananas you can find. Those black-spotted bananas that look like they’re past their prime? Those are actually perfect. The darker the peel, the sweeter and more flavorful your bread will be. If your bananas aren’t ripe enough, you can speed things up by putting them in a paper bag for a day or two.
Don’t overmix the batter. This is probably the biggest mistake people make with banana bread. Once you add the flour, mix just until you don’t see any dry flour anymore. Overmixing develops the gluten and makes your bread tough and dense instead of tender and moist.
Toast your nuts first. Spending five minutes toasting your walnuts in a dry pan brings out their flavor and makes them taste richer. It’s a small step that makes a noticeable difference.
Check for doneness early. Ovens vary wildly, so start checking your bread at the 50-minute mark. Insert a toothpick into the center and if it comes out with just a few moist crumbs (not wet batter), you’re done.
Let it cool completely before slicing. I know it’s tempting to cut into warm banana bread, but letting it cool for at least 30 minutes helps it set properly and makes slicing way easier.
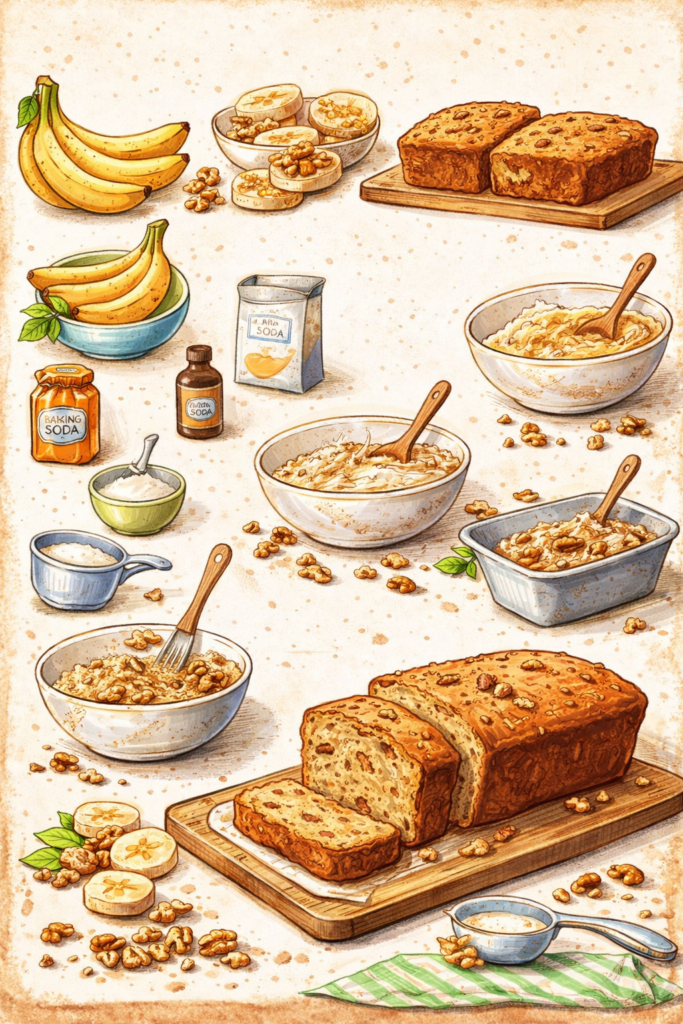
How to Make Banana Nut Bread
Step 1: Prep your pan and preheat
Preheat your oven to 350°F (175°C).
Line your 9×5 inch loaf pan with parchment paper or grease it really well with butter or cooking spray. You want to make sure nothing sticks.
Step 2: Mash those bananas
Peel your overripe bananas and put them in a large mixing bowl.
Use a fork or potato masher to mash them until they’re mostly smooth. A few lumps are totally fine and actually add nice texture to the bread.
Step 3: Mix the wet ingredients
Add the melted butter to your mashed bananas and stir until combined.
Add the sugar, beaten egg, and vanilla extract. Mix everything together until it’s well combined and looks smooth.
Step 4: Add the dry ingredients
Sprinkle the baking soda and salt over the mixture and give it a quick stir.
Add the flour and cinnamon (if using) all at once.
Here’s where you need to be gentle. Fold the flour into the wet ingredients using a wooden spoon or rubber spatula. Mix just until you don’t see any dry flour. Stop as soon as it comes together.
Step 5: Fold in the walnuts
Gently fold in the chopped walnuts, distributing them throughout the batter.
Reserve a small handful to sprinkle on top if you want that bakery look.
Step 6: Bake
Pour the batter into your prepared loaf pan and smooth the top with a spatula.
If you saved some walnuts, sprinkle them on top now.
Bake for 55-65 minutes. Start checking at 50 minutes by inserting a toothpick into the center. It should come out with a few moist crumbs but no wet batter.
Step 7: Cool and serve
Let the bread cool in the pan for about 10 minutes.
Then lift it out using the parchment paper (if you used it) and transfer to a wire rack to cool completely.
Once it’s cool, slice and enjoy!
Substitutions and Variations
Different nuts: Swap the walnuts for pecans, almonds, or macadamia nuts. You can also use a mix of different nuts for more complexity.
No nuts: If you’re not a nut person or have allergies, you can leave them out entirely. You can add chocolate chips instead for a different take.
Oil instead of butter: Replace the melted butter with an equal amount of coconut oil, vegetable oil, or even olive oil. This makes the bread dairy-free.
Whole wheat flour: Substitute half the all-purpose flour with whole wheat flour for a heartier, nuttier flavor. Just know it’ll be slightly denser.
Add-ins: Mix in 1/2 cup of chocolate chips, dried cranberries, or even a swirl of peanut butter. Just fold them in with the walnuts.
Maple sweetener: Replace half the sugar with maple syrup for a deeper, more complex sweetness. You might need to reduce the butter slightly to balance the extra liquid.
Spice it up: Add 1/4 teaspoon of nutmeg or a pinch of cardamom along with the cinnamon for a warm, spiced version.
Make Ahead Tips
You can prepare the dry ingredients (flour, baking soda, salt, cinnamon) the night before and store them in an airtight container.
The batter can be made and poured into the pan, then covered and refrigerated overnight. Just add about 5-10 minutes to the baking time if you’re baking it straight from the fridge.
Leftovers and Storage
At room temperature: Wrap the cooled banana bread tightly in plastic wrap or aluminum foil. It’ll stay moist for 3-4 days on your counter.
In the fridge: If you want to extend its life, store it wrapped in the fridge for up to a week. Just know that refrigeration can sometimes dry it out a bit.
In the freezer: This is my favorite way to store banana bread. Wrap individual slices or the whole loaf tightly in plastic wrap, then again in aluminum foil. Freeze for up to 3 months. Thaw at room temperature or pop frozen slices in the toaster for a quick breakfast.
Reheating: Warm individual slices in the microwave for 15-20 seconds, or toast them in a toaster oven for a crispy exterior and warm, soft interior.
Additional Details
Nutritional Information (per slice, makes 10 slices):
- Calories: 245
- Fat: 11g
- Carbohydrates: 34g
- Protein: 4g
- Fiber: 2g
- Sugar: 17g
Dietary Swaps:
For vegan: Replace the egg with a flax egg (1 tablespoon ground flaxseed + 3 tablespoons water, let sit 5 minutes). Use coconut oil instead of butter.
For gluten-free: Use a 1:1 gluten-free flour blend. The texture might be slightly different but it’ll still taste great.
For lower sugar: Reduce the sugar to 1/2 cup. The bananas provide plenty of natural sweetness.
Meal Pairing Suggestions:
This banana nut bread pairs beautifully with your morning coffee or tea. It also works as an afternoon snack with a glass of cold milk.
For breakfast, serve it toasted with a smear of cream cheese or almond butter. It’s also fantastic alongside Greek yogurt and fresh berries for a more complete meal.
If you’re feeling indulgent, warm it up and serve with a scoop of vanilla ice cream for dessert.
Cooking Time Efficiency:
Total time is about 1 hour 15 minutes (15 minutes prep, 60 minutes baking). But the actual hands-on time is only about 10-15 minutes. The rest is just waiting for your oven to do its thing.
You can make this even faster by having all your ingredients measured out before you start. It’s seriously one of those recipes where everything comes together in one bowl.
FAQ
Why is my banana bread dry?
The most common culprit is overbaking. Start checking your bread 5-10 minutes before the recipe says it’s done. Also, make sure you’re measuring your flour correctly (spoon it into the measuring cup, don’t pack it). Too much flour will dry out your bread.
Can I use frozen bananas?
Yes! Thaw them first and drain any excess liquid. Frozen bananas actually work great because they get super soft and sweet when thawed.
My bread sank in the middle. What happened?
This usually means the bread wasn’t fully baked, or you opened the oven door too early and the temperature dropped. It can also happen if you used too much leavening (baking soda).
Can I double this recipe?
Absolutely. You can make two loaves, or bake it in a 9×13 inch pan. Just reduce the baking time to about 35-40 minutes for the larger pan.
How do I know when it’s done?
The toothpick test is your best friend. Insert a toothpick into the center and if it comes out with a few moist crumbs (not wet batter), you’re good. The top should also be golden brown and spring back when lightly pressed.
Can I make muffins instead of a loaf?
Yes! Fill muffin tins about 2/3 full and bake at 350°F for 18-22 minutes. You’ll get about 12-14 muffins.
Why do I need overripe bananas?
Ripe bananas are sweeter and have a stronger banana flavor. They’re also easier to mash and incorporate into the batter. Underripe bananas will make your bread less flavorful and harder to mix.
Can I reduce the sugar?
You can reduce it to 1/2 cup without sacrificing too much. The bananas add natural sweetness, so the bread won’t be bland. Just know it won’t be quite as sweet.
Wrapping Up
There’s something pretty satisfying about turning sad, spotty bananas into something this good.
This banana nut bread is the kind of recipe you’ll make over and over because it’s easy, uses ingredients you probably already have, and delivers every single time.
The house will smell amazing while it bakes, and you’ll have a homemade treat that’s perfect for breakfast, snacks, or even dessert.
Make it this weekend. Toast a slice with butter. Share it with someone you love.
Then come back and tell me what you thought. Did you add chocolate chips? Toast the walnuts? Make it your own somehow?
Drop a comment below and let me know how yours turned out! 🍌