You know that moment when you bite into a store-bought English muffin and realize half the flavor is missing?
That’s because most commercial versions are designed to sit on shelves, not to actually taste like something real. The crumb is too dense. The nooks and crannies feel obligatory rather than intentional. And don’t even get me started on the weird ingredients list.
Homemade English muffins are a completely different animal.
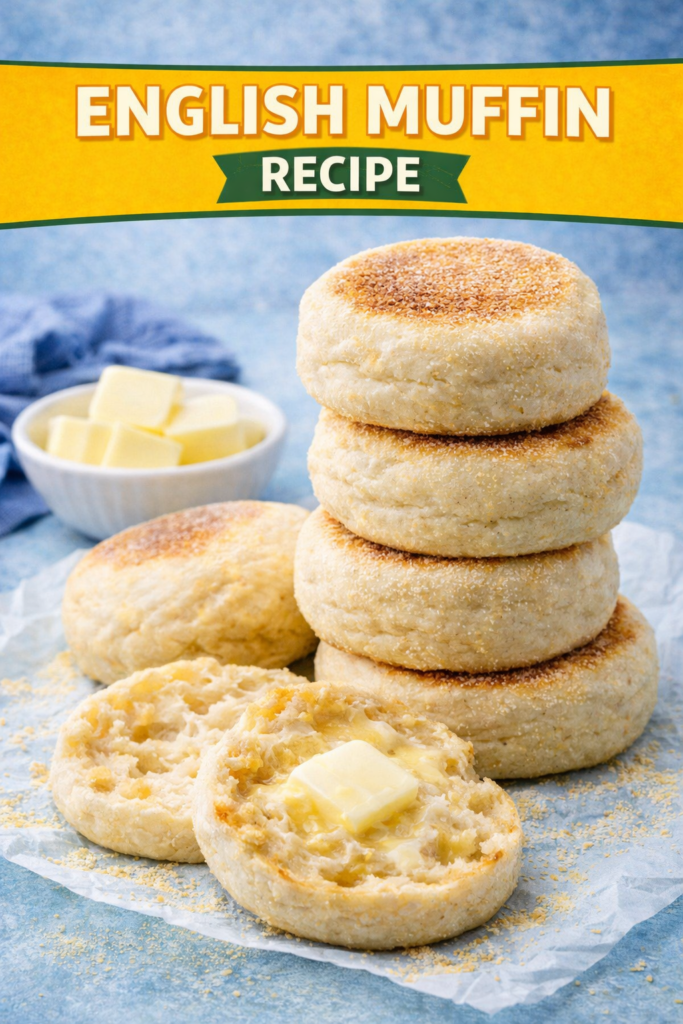
They’re soft, pillowy, and absolutely loaded with those deep, caramelized nooks and crannies that were literally made for holding butter, jam, or whatever else you’re throwing on top. The texture is honestly shocking when you bite into one fresh off the skillet. You’ll understand why bakeries charge $8 for a box of four.
Here’s what surprised me most: these come together in just a couple hours from start to finish, and the actual hands-on time is maybe 15 minutes spread across that time. You’re not standing at the stove the whole time. You’re just mixing, letting them rise, and then cooking them on a griddle or cast iron. That’s it.
There’s a small trick near the end that most home bakers miss that gives you those signature deep pockets in the crumb. I’ll get to that, but spoiler: it’s the difference between a pretty good muffin and one that actually justifies making them at home.
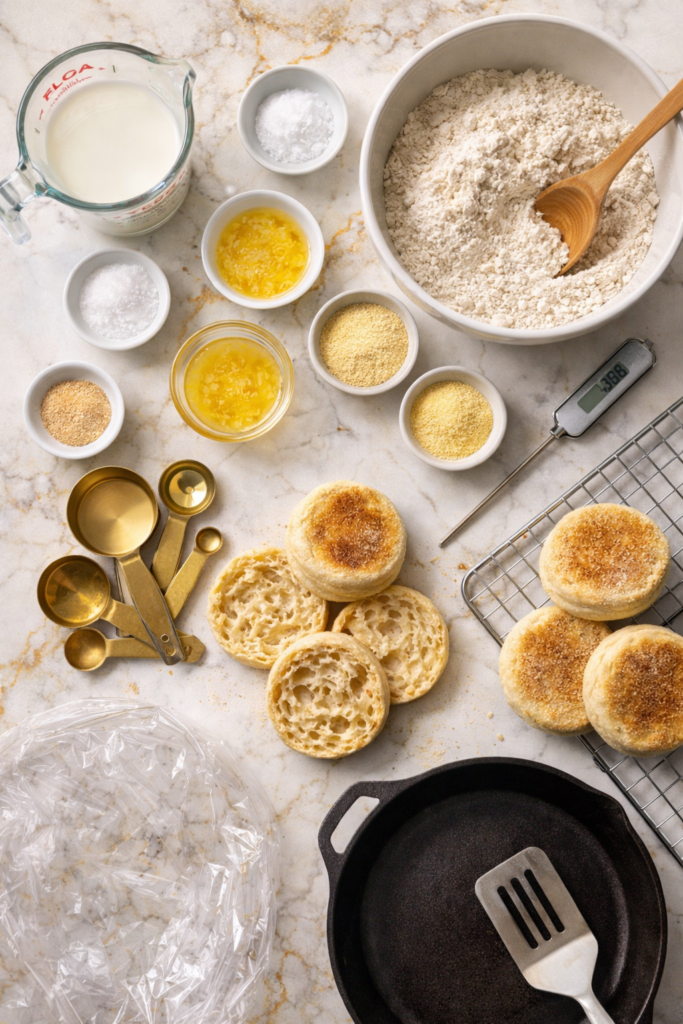
What You’ll Need
For the Dough
- 1 cup whole milk, warmed (110°F/43°C)
- 1 tablespoon sugar
- 1 teaspoon salt
- 2 tablespoons unsalted butter, melted
- 1 tablespoon instant yeast (one packet)
- 3 cups all-purpose flour
- Cornmeal or semolina flour for dusting
Tools You’ll Need
- Large mixing bowl
- Digital thermometer (honestly game-changing for this)
- Wooden spoon or dough whisk
- Measuring cups and spoons
- Plastic wrap or towel
- Cast iron skillet or griddle
- Spatula (a thin metal one works best)
- Cooling rack
Pro Tips
1. Warm your milk properly. This is non-negotiable. If your milk is too cold, the yeast won’t activate. Too hot, and you’ll kill it. Invest in a cheap thermometer. It takes the guesswork out completely and your dough will rise consistently every single time.
2. Don’t skip the second rise. After you shape the muffins, they need at least 45 minutes at room temperature before cooking. This is what creates the light, airy crumb. If you skip this, you get a dense, bread-like muffin instead of the fluffy texture you’re after.
3. Cook on medium-low heat, not high. This is the secret weapon. A hot skillet gives you hard, dark bottoms with a pale top. Medium-low heat means the outside develops that golden color while the inside puffs up properly. It takes longer (about 5-7 minutes per side), but the difference is enormous.
4. Fork-split them, never slice. Once they’re cool, run a fork around the edge and gently pull them apart. This creates those authentic rough edges and uneven texture. Slicing them with a knife gives you flat surfaces instead of those deep, irregular pockets.
5. Let them cool completely before eating. I know this is torture. The steam inside is still setting the crumb structure, and if you bite in too early, the inside will be doughy and gummy. Let them rest on a cooling rack for at least 10 minutes. You can wrap them in a clean towel to keep them warm while they cool.
Substitutions and Variations
| Original | Swap For | Notes |
|---|---|---|
| All-purpose flour | Bread flour | Creates chewier crumb, less tender |
| Whole milk | 2% milk or half-and-half | Works fine, slightly less rich flavor |
| Fresh yeast | Instant yeast | Use the same amount, works identically |
| Butter | Coconut oil | Use melted, flavor will be subtly different |
| Plain muffins | Whole wheat (use 1 cup whole wheat, 2 cups all-purpose) | Nuttier flavor, denser crumb |
| Plain muffins | Cinnamon sugar (add 1 tablespoon cinnamon and 2 tablespoons sugar to the dough) | Sweet and fragrant |
Want a sourdough version? Replace the instant yeast with 1 cup active sourdough starter and reduce the milk to 1/2 cup. The flavor deepens significantly and fermentation takes a bit longer (6-8 hours instead of 2).
Make Ahead Tips
- The dough: Mix it the night before and let it rise slowly in the fridge. Shape the next morning and let them come to room temperature before cooking.
- Cooked muffins: Store in an airtight container for up to 3 days. They reheat beautifully in a toaster.
- Freezing: Wrap cooled muffins individually in plastic wrap and freeze for up to 3 months. Toast straight from frozen.
How to Make English Muffins
Step 1: Mix the Dough
- Pour the warm milk into a large mixing bowl.
- Add sugar, salt, melted butter, and yeast. Stir until the yeast dissolves completely.
- Wait 1 minute for the yeast to activate.
- Add the flour all at once and mix until a shaggy dough forms. The dough should be slightly sticky but manageable.
- Knead for about 5 minutes by hand (or 3 minutes with a stand mixer on low speed). The dough should be smooth and elastic.
Step 2: First Rise
- Cover the bowl with plastic wrap or a damp towel.
- Let it rise at room temperature for 1-1.5 hours until doubled in size.
- Gently poke the dough. It should spring back slowly, not immediately.
Step 3: Shape the Muffins
- Dust your work surface with cornmeal.
- Turn the dough out and gently shape it into a rough rectangle about 1 inch thick.
- Cut the dough into rounds using a 3-inch biscuit cutter or a drinking glass. You should get about 8-10 muffins.
- Dust the top and bottom of each round with cornmeal. This prevents sticking and creates that classic texture.
- Place the shaped muffins on a parchment-lined baking sheet, spacing them about 2 inches apart.
Step 4: Second Rise
- Cover loosely with plastic wrap and let them rise at room temperature for 45 minutes to 1 hour.
- They should puff up slightly and feel light when you gently press one.
Step 5: Cook the Muffins
- Heat a cast iron skillet or griddle to medium-low heat. This takes about 3 minutes.
- Working in batches, place the muffins on the skillet, cornmeal-side down. Don’t overcrowd the pan.
- Cook for 5-7 minutes on the first side. They should turn light golden brown but not dark.
- Flip carefully using a thin metal spatula.
- Cook for another 5-7 minutes on the second side until golden and cooked through.
- Transfer to a cooling rack.
Step 6: Cool and Split
- Let them cool completely (at least 10 minutes).
- Run a fork around the edge of each muffin and gently pull apart along the equator.
- Serve warm with butter, jam, or whatever you like.
Nutritional Breakdown (Per Muffin)
| Nutrient | Amount Per Muffin |
|---|---|
| Calories | ~140 |
| Protein | ~4g |
| Carbohydrates | ~27g |
| Fat | ~2g |
| Fiber | ~1g |
| Sodium | ~290mg |
These are simple, wholesome muffins. No preservatives, no weird additives. Just flour, milk, butter, and yeast doing what they’re supposed to do.
What to Serve With Them
- Salted butter and apricot jam
- Cream cheese and smoked salmon
- Almond butter and honey
- Scrambled eggs and cheddar for breakfast sandwiches
- Simple avocado spread with red pepper flakes
- Ricotta and fresh berries
Leftovers and Storage
- Room temperature: Keep in an airtight container for up to 2 days. They dry out quickly, so store them as soon as they’ve cooled.
- Fridge: Not ideal. The cold accelerates staling. Only do this if you won’t eat them within 2 days.
- Freezer: This is your best bet. Wrap each muffin individually in plastic wrap, then place in a freezer bag. They keep for 3 months.
- Reheating: Pop frozen or thawed muffins into a toaster. They come back to life perfectly. You can also split them first and toast them separately.
- Pro move: Slice them open before freezing so you can toast them straight from the freezer without thawing.
FAQ
Can I use a stand mixer instead of mixing by hand?
Absolutely. Use a stand mixer with the dough hook attachment on low speed for 3-4 minutes. The dough should come together and pull away from the bowl slightly.
What if my dough is too sticky?
Add a tablespoon of flour at a time until it reaches the right consistency. It should be slightly tacky but not stick to your hands when you knead it gently.
Why aren’t my muffins getting those deep pockets?
A few reasons: the heat is probably too high (lower it to medium-low), or the second rise isn’t long enough. The pockets develop when you cook low and slow, giving the steam time to create pockets in the crumb. Also, make sure you’re fork-splitting them, not slicing them with a knife.
Can I use rapid-rise yeast instead of instant?
Yes, it’s basically the same thing. Just watch the timing on the rises. They might be slightly faster.
What’s the difference between cooking in a skillet versus an oven?
Skillets give you those gorgeous golden-brown sides and that slight crust on the bottom. Oven baking (at 350°F for 20 minutes) works but produces a more uniform, less interesting exterior.
Can I make a huge batch and freeze them?
Yes. Make the full recipe, cook them all, cool them completely, and freeze. You can toast them individually whenever you want. This is honestly how I use this recipe. I make a double batch once a month.
My muffins came out dense. What happened?
Either the yeast wasn’t activated properly (temperature matters), the dough didn’t rise enough before cooking, or the heat was too high. Check your milk temperature with a thermometer next time. It should be exactly 110°F.
Wrapping Up
Homemade English muffins are one of those recipes that seem intimidating until you actually make them.
Once you realize they’re just a simple dough that you let rise twice and then cook in a skillet, the whole thing becomes second nature. You’ll be making these constantly. Freezing them. Pulling one out on random mornings. Realizing you’ve saved a ton of money compared to buying them at the bakery.
The texture difference alone is worth it. The flavor is deeper because of the slow fermentation. The nooks and crannies are actually purposeful instead of looking like an afterthought.
Try making a batch this week. Tell me how yours turned out. Did you try any variations? Did you mess up the second rise (it’s a common one)? Drop a comment below and let me know what happened in your kitchen.