You know that cake your grandma used to make that tasted like pure comfort? This is it.
I’m talking about the kind of vanilla cake that’s so good, you don’t even need frosting (but you’ll want it anyway). The kind that stays moist for days. The kind that makes your kitchen smell like a bakery and has people asking if you bought it from one.
I’ve tested this recipe at least 20 times, and it’s never let me down. Not once.
What Makes This Vanilla Cake Different
Most vanilla cakes are either too dense or too dry. This one? It’s perfectly fluffy with a tight crumb that holds up to frosting but still melts in your mouth.
The secret is in the technique, not some fancy ingredient you can’t pronounce.
And here’s the thing: vanilla cake gets a bad rep for being boring. But when it’s done right, it’s anything but. It’s the kind of dessert that works for literally any occasion, from Tuesday night dinners to birthday parties.
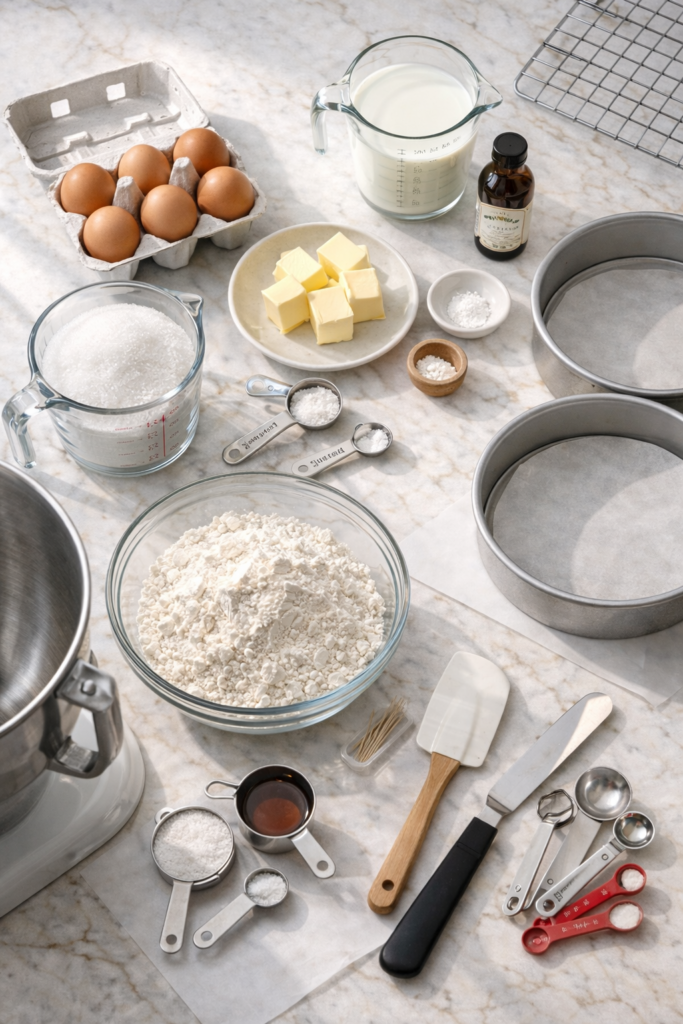
What You’ll Need
For the Cake:
- 2 ¾ cups all-purpose flour
- 2 ½ teaspoons baking powder
- ½ teaspoon salt
- 1 cup unsalted butter, softened to room temperature
- 2 cups granulated sugar
- 4 large eggs, room temperature
- 1 tablespoon pure vanilla extract (not imitation)
- 1 ¼ cups whole milk, room temperature
For the Vanilla Buttercream:
- 1 ½ cups unsalted butter, softened
- 5 cups powdered sugar
- 2 teaspoons pure vanilla extract
- 3-4 tablespoons heavy cream
- Pinch of salt
Tools You’ll Need
You probably have most of these already:
- Two 9-inch round cake pans
- Stand mixer or hand mixer
- Mixing bowls (at least 2)
- Measuring cups and spoons
- Rubber spatula
- Parchment paper
- Cooling racks
- Offset spatula (for frosting)
- Toothpick or cake tester
Pro Tips
These are the things I wish someone had told me the first time I made this cake:
1. Room temperature ingredients are non-negotiable. Cold eggs and milk will make your butter seize up and create a lumpy batter. Take everything out of the fridge 30-60 minutes before you start.
2. Don’t skip sifting the dry ingredients. I know it feels like an extra step, but it makes a massive difference in texture. Those little flour clumps will turn into dense spots in your cake.
3. The toothpick test is your friend. When you insert a toothpick into the center, you want a few moist crumbs clinging to it. Completely clean means you’ve overbaked it.
4. Let the cakes cool completely before frosting. I mean completely. Warm cake + buttercream = melted mess. At least 2 hours on the cooling rack, or pop them in the fridge for 30 minutes to speed things up.
5. Use vanilla extract, not vanilla flavoring. The real stuff costs more, but the flavor difference is huge. This is a vanilla cake, after all.
How to Make the Best Vanilla Cake
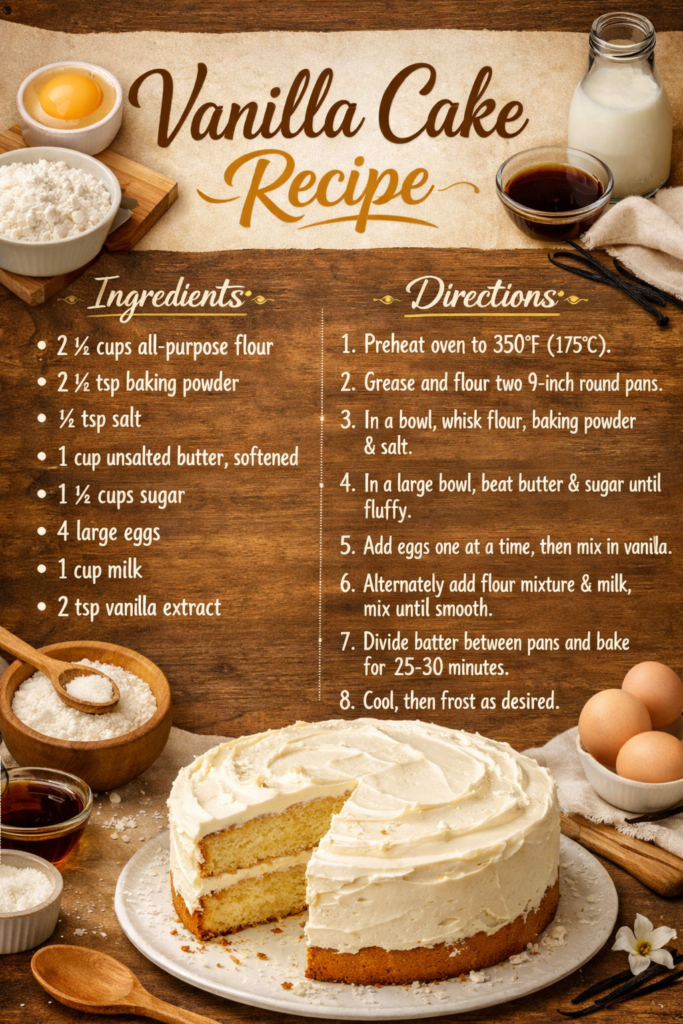
Step 1: Prep everything
Preheat your oven to 350°F. Grease your cake pans with butter, line the bottoms with parchment paper, then grease the parchment. Dust with flour and tap out the excess.
This double-layer of insurance means your cakes will release perfectly every time.
Step 2: Mix the dry ingredients
Whisk together the flour, baking powder, and salt in a bowl. Set aside.
Step 3: Cream the butter and sugar
In your mixer, beat the softened butter on medium speed for about 2 minutes until it’s light and fluffy. Add the sugar and beat for another 3-4 minutes.
This step is where you’re incorporating air into the batter, which is what makes the cake light and fluffy. Don’t rush it.
Step 4: Add the eggs
Add the eggs one at a time, beating well after each addition. The batter should look smooth and creamy, not curdled. Mix in the vanilla extract.
Step 5: Alternate the dry and wet ingredients
Starting and ending with the dry ingredients, add the flour mixture in three parts and the milk in two parts. Mix on low speed just until combined after each addition.
The batter will look thick and fluffy.
Step 6: Bake
Divide the batter evenly between your prepared pans. Smooth the tops with a spatula.
Bake for 28-32 minutes, until the tops spring back when lightly pressed and a toothpick comes out with a few moist crumbs.
Step 7: Cool
Let the cakes cool in the pans for 10 minutes, then turn them out onto cooling racks. Let them cool completely.
Step 8: Make the buttercream
Beat the softened butter on medium speed for 3 minutes until creamy. Add the powdered sugar one cup at a time, mixing on low speed. Add the vanilla, salt, and 3 tablespoons of cream.
Beat on high speed for 3-4 minutes until light and fluffy. If it’s too thick, add more cream a tablespoon at a time.
Step 9: Frost the cake
Place one cake layer on your serving plate. Spread about 1 cup of buttercream on top. Place the second layer on top and frost the top and sides.
You can keep it simple with a rustic look or get fancy with piping.
Substitutions and Variations
Can’t find whole milk? Use 2% milk instead. The cake will be slightly less rich but still delicious.
Want a different flavor? Replace half the vanilla extract with almond extract for a subtle twist. Or add 1 tablespoon of lemon zest to the batter for a vanilla-lemon cake.
Need it dairy-free? Swap the butter for vegan butter sticks (not margarine) and use oat milk or almond milk instead of dairy milk.
Making cupcakes? This recipe makes about 24 cupcakes. Bake at 350°F for 18-22 minutes.
Chocolate frosting instead? Add ¾ cup cocoa powder to the buttercream and an extra 2 tablespoons of cream.
Make Ahead Tips
The cake layers freeze beautifully.
Wrap them individually in plastic wrap, then aluminum foil, and freeze for up to 3 months. Thaw in the fridge overnight before frosting.
You can also make the buttercream 3 days ahead and store it in an airtight container in the fridge. Let it come to room temperature and re-whip it before using.
Leftovers and Storage
Store the frosted cake in an airtight container at room temperature for up to 3 days, or in the fridge for up to 5 days.
Bring it to room temperature before serving for the best texture.
You can also freeze individual slices wrapped in plastic wrap for up to 3 months. Perfect for when you want cake but don’t want to make a whole one.
FAQ
Why did my cake turn out dense? You probably overmixed the batter after adding the flour, or your baking powder was expired. Mix just until combined and always check your leavening agents.
Can I use cake flour instead? Yes! Cake flour will make it even more tender. Use 3 cups of cake flour instead of 2 ¾ cups all-purpose.
My buttercream is too soft. Help! Pop it in the fridge for 15 minutes, then re-whip it. If it’s still soft, add more powdered sugar ¼ cup at a time.
Can I make this in a 9×13 pan? Absolutely. Bake for 35-40 minutes. You’ll have a sheet cake instead of a layer cake.
Why did my cake dome in the middle? That’s normal! You can level it with a serrated knife before frosting, or just embrace the dome and eat the scraps.
Do I have to use parchment paper? Not technically, but it makes getting the cakes out so much easier. Trust me on this one.
Nutritional Information
Per slice (1/12 of cake with frosting):
- Calories: 580
- Fat: 28g
- Carbohydrates: 78g
- Protein: 5g
- Sugar: 62g
- Sodium: 180mg
Note: This is an estimate and will vary based on exact ingredients and portion sizes.
What Goes Well With Vanilla Cake
This cake is versatile enough to pair with almost anything:
Fresh berries: Strawberries, raspberries, or blueberries cut through the sweetness perfectly.
Coffee or tea: A classic pairing that never fails.
Ice cream: Vanilla ice cream for a double vanilla hit, or chocolate for contrast.
Caramel sauce: Drizzle it over individual slices for an extra indulgent dessert.
Wrapping Up
This vanilla cake has been a staple in my kitchen for years, and I hope it becomes one in yours too.
The best part? Once you master this recipe, you can customize it endlessly. Add lemon zest, swap the vanilla for almond extract, or turn it into cupcakes.
Make it for a birthday, a Tuesday, or just because you want your house to smell amazing.
Drop a comment below once you’ve tried it. I want to know how it turned out for you, and if you added your own twist to it.