You know that feeling when you bite into something so perfectly balanced between sweet and tart that you immediately want another piece?
That’s what these lemon bars do.
I’ve been making lemon bars for years, and I can tell you right now that most recipes out there are either too sweet, too sour, or have a crust that’s more like cardboard than butter heaven.
This one gets it right.
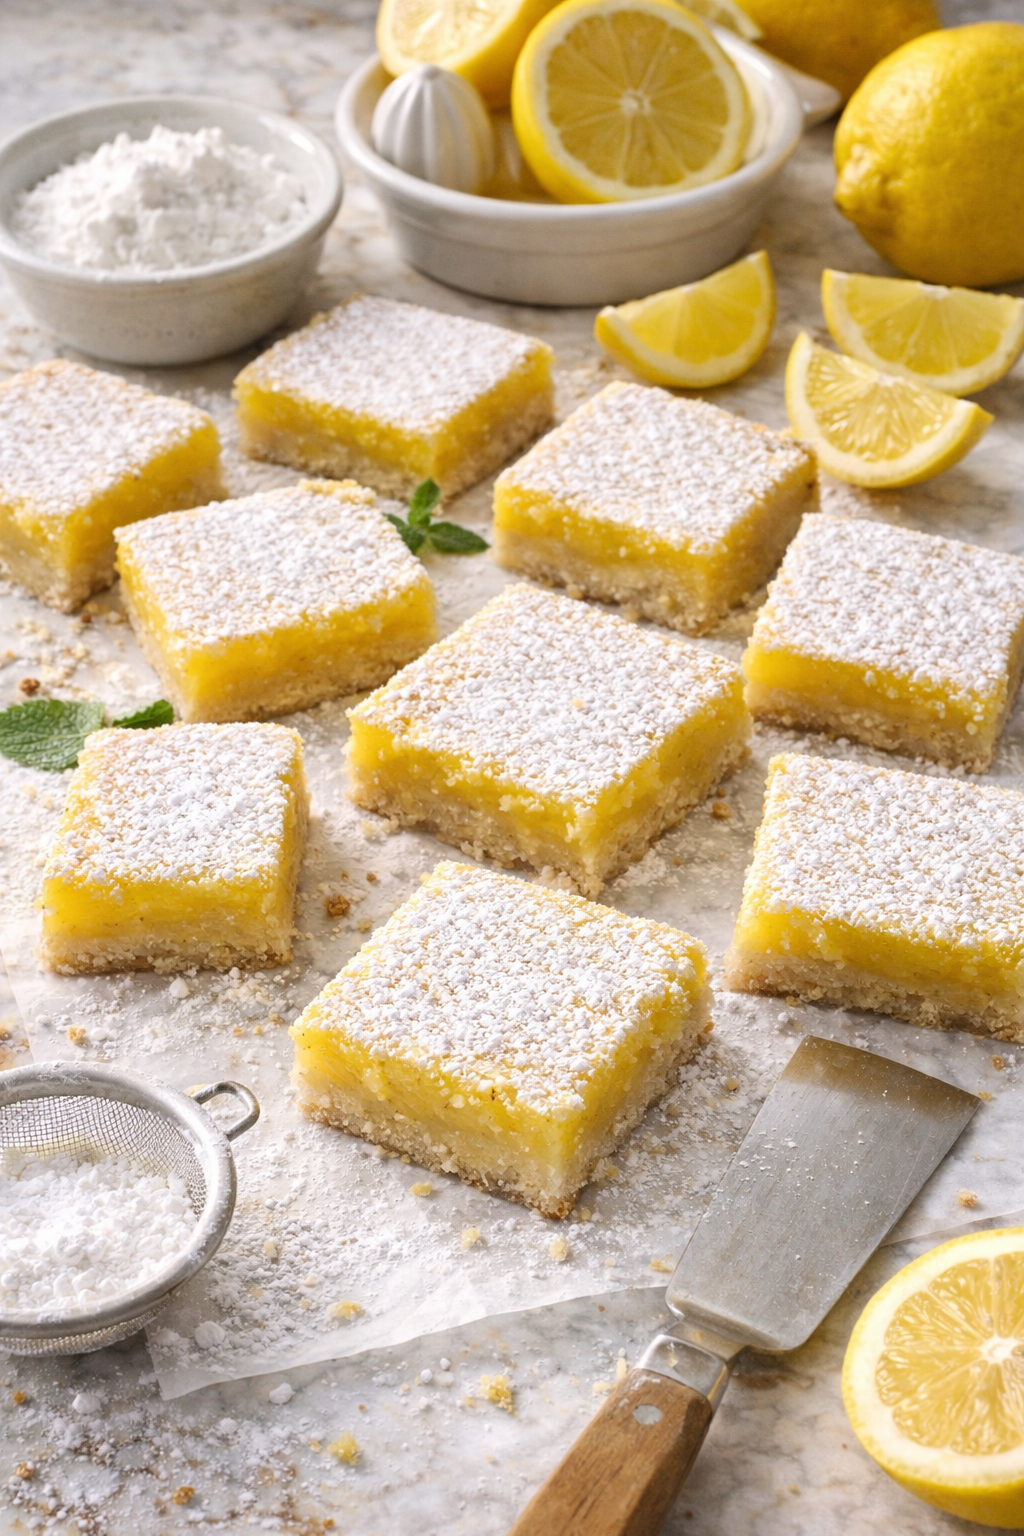
The crust is buttery and crumbly (almost shortbread-like), the filling is creamy with just the right amount of pucker, and the powdered sugar on top? That’s not just for looks. It actually balances the whole thing perfectly.
These are the kind of bars that disappear at potlucks before you can even grab a second one for yourself. And they’re surprisingly simple to make, which is always a win in my book.
What You’ll Need
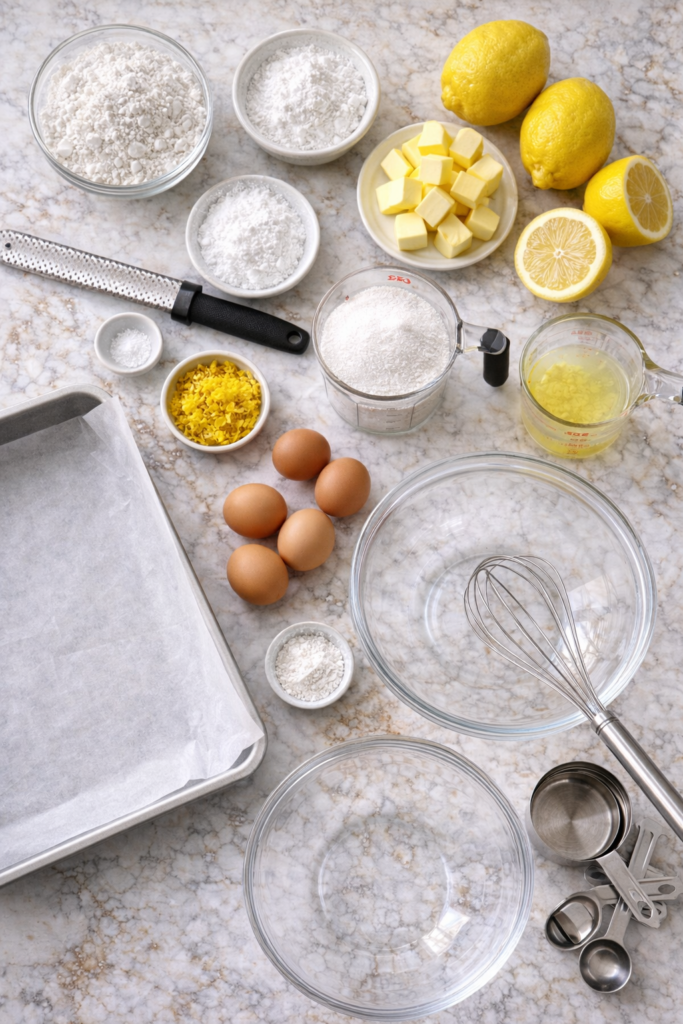
For the Crust:
- 2 cups all-purpose flour
- 1/2 cup powdered sugar
- 1 cup (2 sticks) unsalted butter, cold and cubed
- 1/4 teaspoon salt
For the Lemon Filling:
- 4 large eggs
- 1 3/4 cups granulated sugar
- 1/3 cup all-purpose flour
- 2/3 cup fresh lemon juice (about 4-5 lemons)
- 1 tablespoon lemon zest
- 1/4 teaspoon salt
For Topping:
- 1/4 cup powdered sugar for dusting
Tools You’ll Need:
- 9×13 inch baking pan
- Parchment paper
- Mixing bowls (2)
- Whisk
- Microplane or zester
- Citrus juicer (or just your hands and a fork)
- Measuring cups and spoons
- Sharp knife for cutting
Pro Tips
Use fresh lemon juice, not bottled. I know it’s tempting to grab that plastic lemon from the fridge, but trust me on this one. Fresh juice makes all the difference. The flavor is brighter, more complex, and just tastes… real.
Don’t skip the parchment paper. Line your pan with parchment paper and leave some overhang on the sides. This is your ticket to actually getting the bars out of the pan in one piece instead of scraping them out like some kind of lemon disaster.
Let the crust cool before adding the filling. I learned this the hard way. If you pour the filling onto a hot crust, it starts cooking immediately and you end up with weird texture issues. Just give it 10 minutes to cool down. Go check your phone or something.
The filling should jiggle slightly when done. You’re looking for a custard that’s set but still has a slight wobble in the center when you shake the pan. It’ll firm up as it cools. Overbake it and you’ll have chalky, sad lemon bars.
Dust with powdered sugar after they’re completely cool. Do it while they’re warm and the sugar just melts into a weird glaze. Not cute.
Substitutions and Variations
Can’t do gluten? Swap the all-purpose flour with a 1:1 gluten-free baking flour. I’ve tried this with Bob’s Red Mill and it worked great.
Want them less sweet? Cut the sugar in the filling down to 1 1/2 cups. They’ll be more tart, but some people are into that.
Lime bars instead? Just swap the lemon juice and zest for lime. Key limes work especially well if you can find them.
Berry lemon bars? Add 1/2 cup of fresh raspberries or blueberries on top of the filling before baking. They’ll sink in a bit and create these beautiful pockets of fruit.
Make them fancier? Top with fresh whipped cream and a few fresh berries when serving. Suddenly your simple bars look like something from a bakery.

Make Ahead Tips
These are actually better the next day.
The flavors meld together and the texture gets even more perfect. You can make them up to 2 days ahead, keep them covered in the fridge, and just dust with powdered sugar before serving.
You can also freeze the unbaked crust for up to 3 months. Just wrap it tightly in plastic wrap and aluminum foil. When you’re ready to use it, bake from frozen and add an extra 5-10 minutes to the baking time.
How to Make Lemon Bars
Step 1: Prep your pan
Preheat your oven to 350°F. Line a 9×13 inch baking pan with parchment paper, making sure to leave some overhang on the sides (this is how you’ll lift the bars out later).
Step 2: Make the crust
In a medium bowl, whisk together 2 cups flour, 1/2 cup powdered sugar, and 1/4 teaspoon salt. Add the cold, cubed butter and use your fingers (or a pastry cutter if you’re fancy) to work it into the flour mixture.
You want it to look like coarse crumbs. Some pea-sized pieces of butter are totally fine.
Step 3: Bake the crust
Press the mixture evenly into your prepared pan. Really press it down so it’s compact. Bake for 18-20 minutes until it’s just starting to turn golden at the edges.
Take it out and let it cool for about 10 minutes while you make the filling. Don’t skip the cooling part.
Step 4: Make the filling
In another bowl, whisk together the 4 eggs and 1 3/4 cups sugar until they’re smooth and slightly frothy.
Add 1/3 cup flour, 2/3 cup lemon juice, 1 tablespoon lemon zest, and 1/4 teaspoon salt. Whisk until everything is completely combined and smooth.
Step 5: Bake the bars
Pour the filling over the cooled crust. Bake for 22-25 minutes. You’re looking for the filling to be set but still have a slight jiggle in the center when you shake the pan gently.
The edges might puff up a tiny bit. That’s normal.
Step 6: Cool completely
This is the hardest part because they smell incredible and you want to eat them immediately.
But resist.
Let them cool at room temperature for about an hour, then transfer to the fridge for at least 2 hours (or overnight). This helps them set properly so you can cut clean squares.
Step 7: Cut and serve
Use the parchment paper overhang to lift the whole thing out of the pan. Place on a cutting board.
Dust the top generously with powdered sugar. Use a sharp knife (wipe it clean between cuts) to slice into squares.
Serve cold or at room temperature.
Leftovers and Storage
Store these in an airtight container in the fridge for up to 5 days.
They actually get better after a day or two as the flavors develop. The crust stays surprisingly crisp even when refrigerated, which is kind of amazing.
You can also freeze them for up to 3 months. Just layer them between parchment paper in a freezer-safe container. Thaw in the fridge overnight before serving.
Pro tip: don’t dust them with powdered sugar before freezing. Do that right before you serve them so they look fresh.
FAQ
Why are my lemon bars runny?
Two reasons: either you didn’t bake them long enough, or you didn’t let them cool completely before cutting. The filling needs time to set up in the fridge. If you cut them while they’re still warm, they’ll be a mess.
Can I use bottled lemon juice?
You can, but I wouldn’t recommend it. The flavor is just flat compared to fresh. Plus, you need the zest anyway, so you might as well use fresh lemons for everything.
My crust is too hard. What happened?
You probably over-mixed the butter into the flour or baked it too long. The crust should be tender and crumbly, not hard. Make sure your butter is cold and don’t overwork the dough.
Can I double this recipe?
Absolutely. Just use two 9×13 pans or one very large sheet pan. The baking times should stay about the same, but keep an eye on them.
How do I know when they’re done?
The filling should be set around the edges but still slightly jiggly in the center. It’ll continue to set as it cools. If you bake them until they’re completely firm, they’ll be overbaked and chalky.
Can I make these in a different size pan?
Sure, but you’ll need to adjust the baking time. A smaller, deeper pan will need more time. A larger, shallower pan will need less. Just watch for that slight jiggle in the center.
Why do I need to zest the lemons?
The zest has all these oils that give you that intense lemon flavor. The juice gives you the tartness, but the zest gives you the lemon flavor. Don’t skip it.
Can I make these vegan?
It’s tricky because eggs are pretty crucial to the custard texture of the filling. There are vegan versions out there using things like silken tofu or aquafaba, but I haven’t tested those myself so I can’t vouch for them.
Nutritional Information
Per serving (1 bar, recipe makes 24):
- Calories: 185
- Fat: 8g
- Saturated Fat: 5g
- Carbohydrates: 27g
- Sugar: 19g
- Protein: 2g
- Sodium: 75mg
- Cholesterol: 50mg
Keep in mind these are treats, not health food. But at least they’re portion-controlled if you cut them into smaller squares 😊
Perfect Pairings
These go really well with:
- Hot coffee or tea (the bitterness balances the sweet)
- Fresh berries on the side
- A scoop of vanilla ice cream if you’re feeling extra
- Iced tea for a summer afternoon
Time Breakdown
- Prep time: 15 minutes
- Crust baking: 20 minutes
- Filling baking: 25 minutes
- Cooling time: 3 hours minimum
- Total active time: 40 minutes
- Total time: About 4 hours
Most of that is just waiting, which means you can make these while you’re doing other things around the house.
Why This Recipe Works
The ratio of lemon to sugar is spot-on.
Most lemon bar recipes are either way too sweet (so you can barely taste the lemon) or so tart your face puckers up. This one hits that sweet spot where you get both flavors clearly.
The crust-to-filling ratio is also key. Too much crust and it’s just a cookie with some lemon on top. Too little and it gets soggy. This recipe gives you a sturdy base that can handle the custard without falling apart.
And baking the crust first? That’s non-negotiable. It creates a barrier so the filling doesn’t seep into the crust and make it soggy.
Wrapping Up
Honestly, once you make these lemon bars, you’ll understand why people lose their minds over them at bake sales.
They’re bright, they’re beautiful, they’re the perfect balance of sweet and tart, and they’re way easier to make than they look.
Plus, they’re one of those recipes that makes you look like a baking genius when really, you’re just following simple steps.
Make a batch this weekend. Bring them to your next gathering. Watch them disappear.
Then come back and tell me if you made any fun variations or if you have any questions. I’d love to hear how they turned out for you!