You know that one dessert at every Fourth of July party that gets demolished in about 10 minutes flat?
This is it.
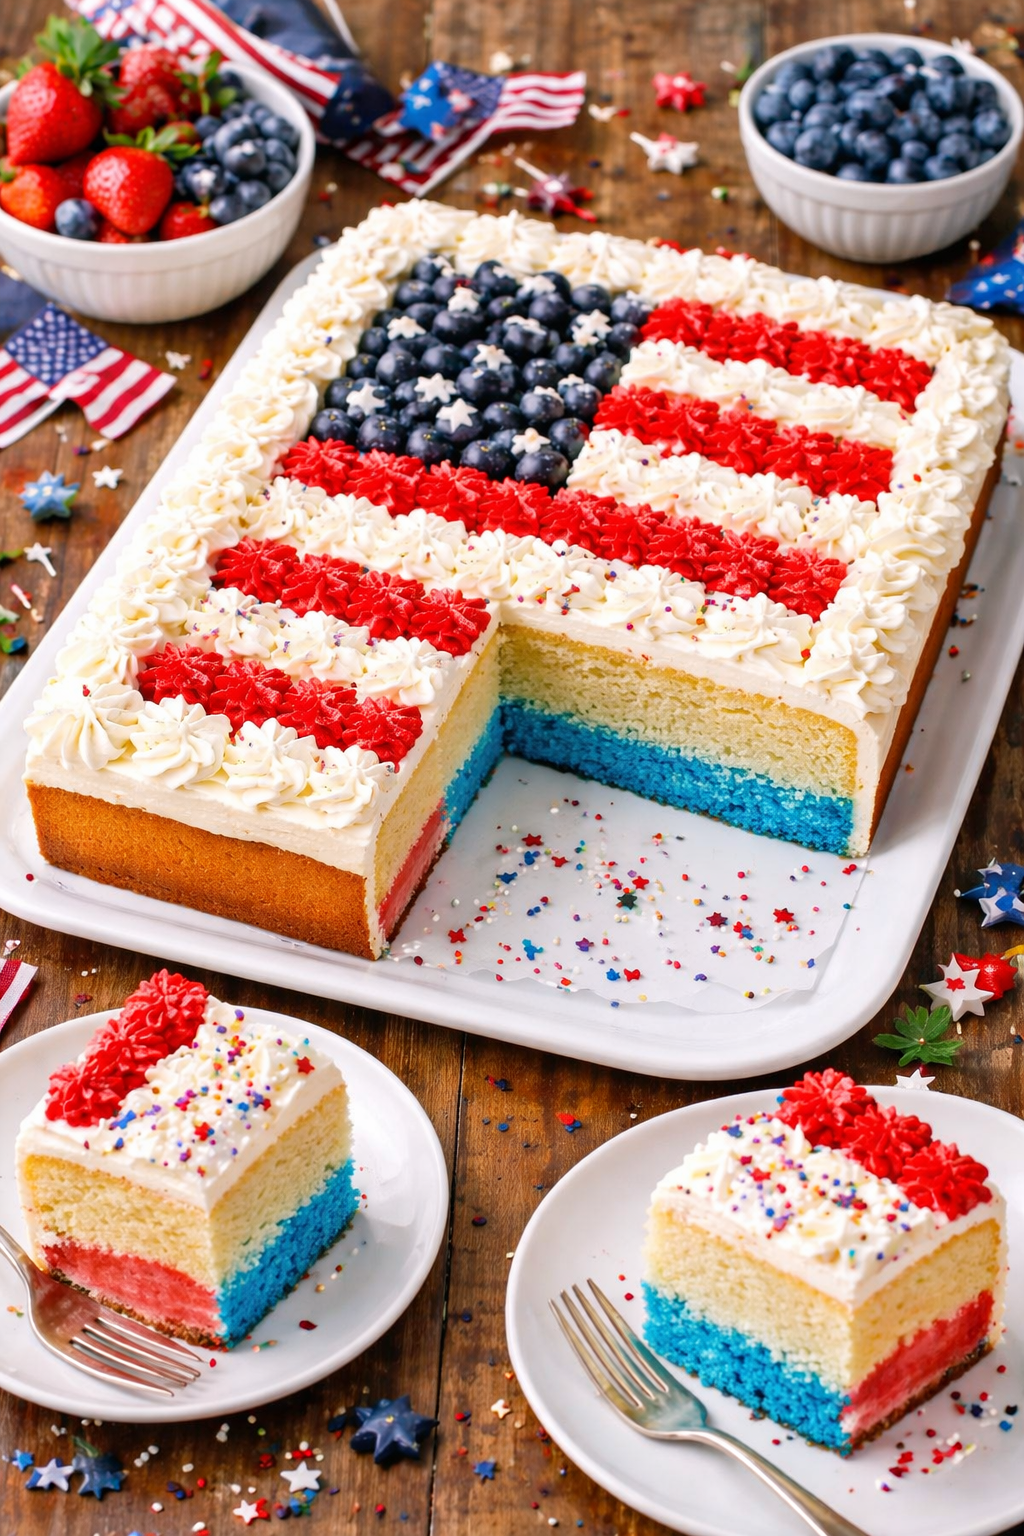
I’m talking about a towering, gorgeous red, white, and blue layer cake that tastes just as good as it looks. And here’s the thing: you don’t need to be a professional baker to pull this off. You just need about two hours, some basic baking skills, and the willingness to go all-in on America’s birthday.
I started making this cake about five summers ago when I got tired of bringing the same old store-bought sheet cake to BBQs. I wanted something that felt special but didn’t require a culinary degree to execute. After testing different recipes and flavor combos, I landed on this version that uses fresh berries, a light vanilla cake, and a cream cheese frosting that people literally scrape off the plate.
The reactions are always worth it. Last year, my neighbor asked if I’d start a bakery. (I won’t, but I appreciated the vote of confidence.)
And the best part? You can make most of this ahead. The cake layers freeze beautifully, and the frosting holds up in the fridge for days. So you’re not stuck in the kitchen while everyone else is enjoying the sunshine and burgers.
Let’s make a cake that’s actually worth the hype.
What You’ll Need
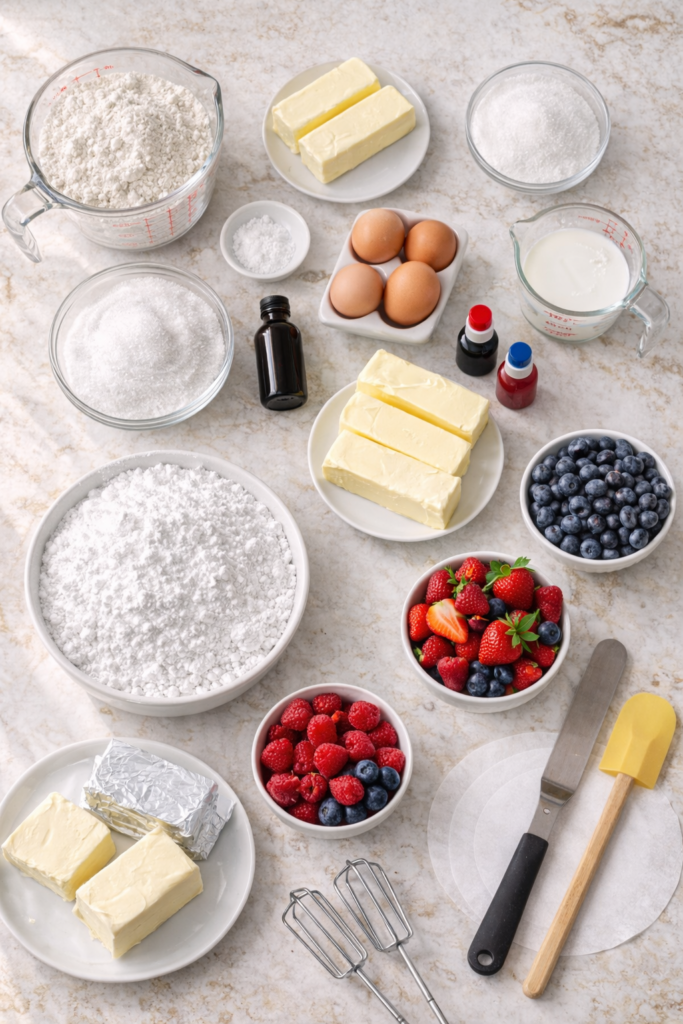
For the Cake:
- 3 cups all-purpose flour
- 1 tablespoon baking powder
- 1/2 teaspoon salt
- 1 cup unsalted butter, room temperature
- 2 cups granulated sugar
- 4 large eggs, room temperature
- 1 tablespoon vanilla extract
- 1 cup whole milk, room temperature
- Red gel food coloring
- Blue gel food coloring
For the Cream Cheese Frosting:
- 16 oz cream cheese, room temperature (two 8 oz blocks)
- 1 cup unsalted butter, room temperature
- 6 cups powdered sugar
- 2 teaspoons vanilla extract
- Pinch of salt
For the Berry Filling & Decoration:
- 2 cups fresh strawberries, hulled and sliced
- 1 cup fresh blueberries
- 2 tablespoons granulated sugar
- Fresh raspberries for decoration (optional but gorgeous)
Tools You’ll Need
- Three 8-inch round cake pans
- Parchment paper
- Stand mixer or hand mixer
- Large mixing bowls (at least 2)
- Rubber spatula
- Offset spatula (makes frosting SO much easier)
- Cake turntable (optional but super helpful)
- Cooling racks
- Toothpicks
- Small bowls for dividing batter
Pro Tips
Room temperature ingredients are non-negotiable. Cold eggs and butter will give you a dense, uneven cake. I set mine out about an hour before I start baking, and it makes all the difference in texture.
Use gel food coloring, not liquid. Liquid dyes mess with your batter ratios and you’ll need about half a bottle to get vibrant colors. Gel gives you that bold red and blue with just a few drops. I learned this the hard way when my first attempt turned out pastel pink instead of patriotic red.
Freeze your cake layers before frosting. This is a game-changer. Pop those cooled layers in the freezer for 30 minutes and they’ll be so much easier to handle. No more crumbs mixing into your frosting or layers sliding around like they’re on an ice rink.
Don’t skimp on the frosting between layers. You want a good half-inch thickness between each layer. Skimpy frosting = dry cake. Generous frosting = the kind of cake people ask you to make again next year.
Berry juice is your enemy. When you’re adding those strawberries between layers, pat them dry with a paper towel first. Too much juice will make your cake soggy and your frosting runny. Not cute.
Substitutions and Variations

Buttermilk instead of whole milk: Makes the cake even more tender and gives it a slight tang that pairs beautifully with the cream cheese frosting. Use the same amount.
Sour cream frosting: If you’re not a cream cheese person (are you okay?), swap it for an equal amount of sour cream. Still tangy, slightly different flavor profile.
Different berry combo: Raspberries and blackberries work great too. I’ve even done a mixed berry situation with all four and it was stunning.
Make it chocolate: Use your favorite chocolate cake recipe for the layers instead. The red, white, and blue aesthetic still works, and chocolate + berries is an elite combination.
Skip the food coloring: If you’re not into artificial dyes, you can leave the cake layers their natural vanilla color and let the berries do all the color work. Still festive, just more understated.
Add lemon: A tablespoon of lemon zest in the frosting adds a brightness that cuts through all that sweetness. Highly recommend if you like things on the less-sweet side.
Make Ahead Tips
The cake layers can be baked up to 3 months in advance. Wrap them tightly in plastic wrap, then aluminum foil, and freeze. Thaw in the fridge overnight before assembling.
Frosting keeps in the fridge for up to a week. Bring it to room temperature and re-whip it for about 2 minutes before using. It’ll look separated and weird when you first pull it out, but the mixer fixes everything.
You can assemble the entire cake the day before your event. Keep it in the fridge, then bring it to room temperature about an hour before serving for the best flavor and texture.
How to Make Your Fourth of July Cake
Step 1: Prep your pans and preheat.
Preheat your oven to 350°F. Line the bottom of three 8-inch round cake pans with parchment paper, then grease the sides with butter or cooking spray. This double insurance policy means your cakes will actually come out of the pans instead of sticking like glue.
Step 2: Mix your dry ingredients.
Whisk together the flour, baking powder, and salt in a medium bowl. Set it aside. Riveting stuff, I know.
Step 3: Cream the butter and sugar.
In your stand mixer (or large bowl with hand mixer), beat the butter and sugar together on medium-high speed for about 4 minutes. You want it light, fluffy, and almost white in color. This step incorporates air and makes your cake tender instead of dense.
Step 4: Add eggs and vanilla.
Add your eggs one at a time, beating well after each addition. Then mix in the vanilla. Your batter should look smooth and glossy.
Step 5: Alternate dry and wet ingredients.
Add about a third of your flour mixture, mix on low until just combined, then add half the milk. Repeat, ending with the flour. Don’t overmix here or you’ll develop too much gluten and end up with a tough cake. Mix until you just don’t see any white streaks anymore.
Step 6: Divide and color your batter.
Divide your batter evenly into three bowls. I use a kitchen scale because I’m slightly obsessive about even layers, but eyeballing works fine too.
Leave one bowl plain (that’s your white layer). Add red gel coloring to another bowl until you get that vibrant red. Start with 3-4 drops and add more as needed. Do the same with blue for the third bowl.
Step 7: Bake.
Pour each colored batter into its own prepared pan. Smooth the tops with a spatula. Bake for 25-30 minutes, or until a toothpick inserted in the center comes out clean.
The cakes should spring back when you gently press the center, and the edges will start pulling away slightly from the pan sides.
Step 8: Cool completely.
Let the cakes cool in their pans for 10 minutes, then turn them out onto cooling racks. Let them cool completely before frosting. And I mean completely. Frosting warm cake = melted frosting disaster.
Step 9: Make your cream cheese frosting.
Beat the cream cheese and butter together until smooth and fluffy, about 3 minutes. Add the powdered sugar one cup at a time, mixing on low until incorporated, then increase speed and beat until fluffy. Mix in vanilla and salt.
You want this frosting thick enough to hold its shape but spreadable. If it’s too stiff, add a tablespoon of heavy cream. Too soft? Add more powdered sugar.
Step 10: Prep your berries.
Toss your sliced strawberries with the 2 tablespoons of sugar and let them sit for about 10 minutes. This draws out some of the juice and makes them taste even more intense. Then pat them dry with paper towels before using.
Step 11: Assemble your cake.
If you froze your layers, now’s the time to pull them out. Place your blue layer on a cake stand or plate. Spread about 3/4 cup of frosting on top. Add half of your strawberries on top of the frosting.
Add the white layer. More frosting, more strawberries. Top with the red layer. Use the remaining frosting to cover the top and sides of the entire cake. An offset spatula makes this so much easier, and a turntable is basically cheating (in the best way).
Step 12: Decorate.
This is where it gets fun. Top the cake with fresh blueberries, strawberries, and raspberries arranged however you want. I usually do a gradient effect from red on one side to blue on the other, but honestly just piling them on top looks amazing too.
For extra drama, add some frosting swirls or stars with a piping bag. But the berries alone are stunning.
Step 13: Chill before serving.
Let the whole thing chill in the fridge for at least an hour. This sets the frosting and makes slicing cleaner. Bring it to room temperature about 30 minutes before serving for the best flavor.
Leftovers and Storage
This cake keeps beautifully in the fridge for up to 5 days, covered loosely with plastic wrap or in a cake container.
The berries might release some juice over time, which can make the frosting a little pink or purple. It still tastes amazing, just looks more tie-dye than patriotic by day four.
You can freeze individual slices wrapped in plastic wrap and foil for up to 2 months. Thaw in the fridge overnight.
Pro move: freeze a slice for a random Tuesday in September when you’re craving summer vibes. It’s like a time machine made of cake.
Nutrition Information (Per Slice, 12 servings)
- Calories: 685
- Total Fat: 32g
- Saturated Fat: 20g
- Cholesterol: 145mg
- Sodium: 285mg
- Total Carbohydrates: 94g
- Dietary Fiber: 1g
- Sugars: 74g
- Protein: 6g
(These are estimates. Your actual numbers might vary based on how heavy-handed you are with the frosting.)
Pairing Suggestions
This cake is rich and sweet, so it pairs best with:
- Black coffee (the bitterness balances all that sugar perfectly)
- Unsweetened iced tea
- Champagne or prosecco (for the fancy Fourth of July crowd)
- Vanilla ice cream on the side (because why not)
Keep the drinks simple. The cake is the star here.
FAQ
Can I make this as cupcakes instead?
Absolutely. This recipe makes about 36 cupcakes. Bake at 350°F for 18-22 minutes. Divide the batter into three colors and make 12 of each. Top with the same cream cheese frosting and fresh berries.
My frosting is too soft to spread. Help?
Pop it in the fridge for 15 minutes, then re-whip it. If that doesn’t work, add more powdered sugar a quarter cup at a time until it thickens up.
Can I use frozen berries?
Fresh is better for decoration since frozen berries get mushy when they thaw. But you can use frozen berries for the filling between layers if you thaw them completely and drain off the excess liquid.
How do I get my layers perfectly flat?
Use cake strips (wet fabric strips that wrap around your pans) or bake at a slightly lower temperature (325°F for 30-35 minutes). You can also just level them with a serrated knife after they cool. I always do this because I’m not patient enough for cake strips.
Do I have to use three pans?
Nope. You can bake the layers one at a time if you only have one or two pans. Just wash and re-prep the pan between batches. It’ll take longer, but the results are the same.
Is this cake super sweet?
It’s definitely on the sweeter side. The cream cheese frosting helps balance it with some tang, and the fresh berries add a touch of tartness. If you’re sensitive to sweetness, reduce the sugar in the frosting by a cup.
Can I make this dairy-free?
You can substitute vegan butter and dairy-free cream cheese for the frosting. For the cake, use a plant-based milk and vegan butter. I haven’t tested this version personally, but I’ve had readers tell me it worked well.
Wrapping Up
There’s something about a homemade layer cake that just hits different at a summer party.
Maybe it’s the fact that people can see you actually put effort into it. Or maybe it’s just that fresh berries and cream cheese frosting are objectively delicious and we should stop pretending otherwise.
This Fourth of July cake recipe has become my go-to for every summer BBQ, and honestly, people have started requesting it for birthdays, graduations, and random Saturdays. It’s that good.
The colors are festive without being over-the-top. The flavors are classic and crowd-pleasing. And the whole thing just feels celebratory in a way that makes people smile when you set it down on the table.
So make this cake. Bring it to your party. Watch it disappear.
And then come back here and drop a comment about how it went. Did you change anything? Add extra berries? Attempt a piping bag situation? I want to hear all about it. 🎆