I’ll never forget the first time I tried Magnolia Bakery’s banana pudding.
My friend had been raving about it for weeks, and when I finally got my hands on a cup, I understood the hype. The layers of vanilla wafers, fresh bananas, and that impossibly creamy pudding – it was like childhood nostalgia met gourmet dessert.
But here’s the thing: you don’t need to fly to New York or wait in those crazy lines to get your fix.
This copycat recipe tastes just as good (some would say better) than the original, and you can make it in your own kitchen. I’ve made this dozens of times now, and every single time, people ask for the recipe.
So if you’ve been craving that iconic banana pudding but don’t have a Magnolia Bakery nearby, keep reading. You’re about to become everyone’s favorite person at potlucks.
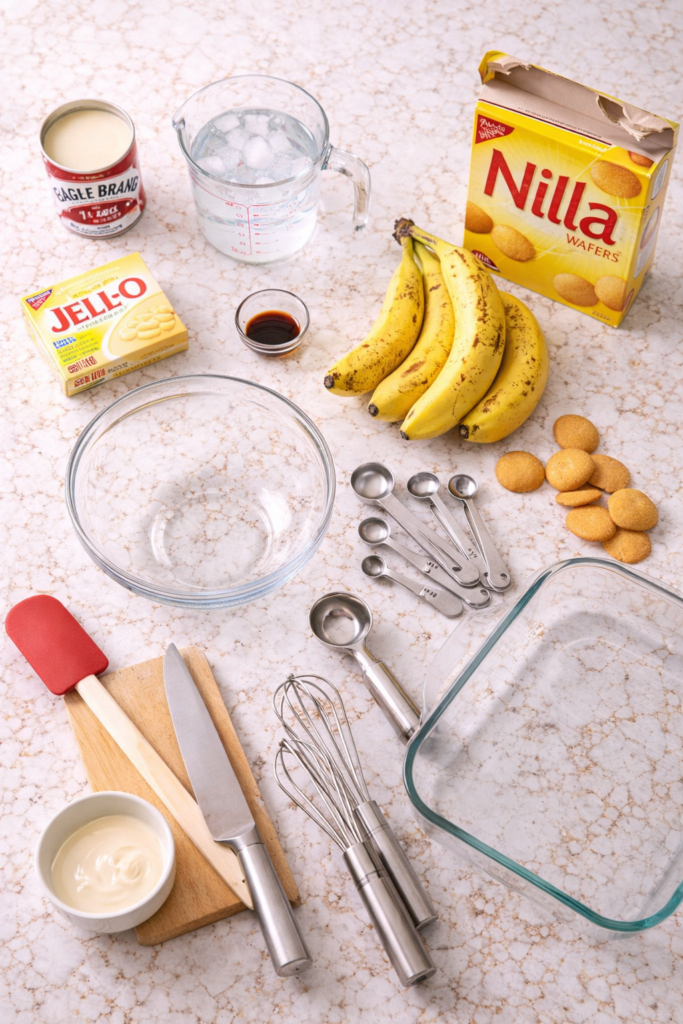
What You’ll Need
The ingredient list is surprisingly simple. You probably have half of these in your pantry already.
For the Pudding:
- 1 (14 oz) can sweetened condensed milk
- 1½ cups ice-cold water
- 1 (3.4 oz) box instant vanilla pudding mix
- 3 cups heavy cream (cold, straight from the fridge)
- 1 teaspoon pure vanilla extract
For the Layers:
- 4-5 ripe bananas (not too green, not too brown)
- 1 (11 oz) box Nilla Wafers (the original ones, trust me on this)
That’s it. Seven ingredients standing between you and banana pudding bliss.
Tools You’ll Need
Nothing fancy here:
- Large mixing bowl
- Electric mixer (handheld or stand mixer works)
- Rubber spatula
- 9×13 inch baking dish (or a large trifle bowl if you want to get fancy)
- Sharp knife for slicing bananas
- Measuring cups and spoons
Pro Tips
After making this recipe more times than I can count, here’s what I’ve learned:
Use cold cream. Like, really cold. Pop it in the freezer for 10 minutes before whipping if you want to be extra. Cold cream whips up faster and holds its shape better. Room temperature cream just won’t give you that dreamy, fluffy texture you’re after.
Don’t skip the instant pudding mix. I know some people want to make everything from scratch, but the instant pudding is what gives this recipe its signature texture. It thickens the mixture perfectly without any cooking required.
Layer strategically. Your first layer should be wafers, not pudding. This creates a stable base and prevents the bottom from getting too soggy too quickly. Plus, it looks better when you cut into it.
Make it ahead, but not too far ahead. This dessert actually tastes better after sitting in the fridge for a few hours (or even overnight), but don’t make it more than 24 hours in advance. The bananas will start to brown and the wafers will get mushy.
Slice bananas at an angle. It sounds silly, but angled slices look so much prettier than straight cuts. Plus, you get more surface area, which means more banana flavor in every bite.
Substitutions and Variations
This recipe is pretty forgiving. Here are some ways to switch it up:
Dietary swaps:
- Sugar-free pudding mix works great if you’re watching sugar intake
- Use coconut cream instead of heavy cream for a dairy-free version (make sure it’s the full-fat kind)
- Gluten-free vanilla wafers are available at most grocery stores
Flavor twists:
- Add a layer of dulce de leche between the pudding and bananas (trust me on this)
- Sprinkle crushed toffee bits on top for extra crunch
- Mix in a tablespoon of bourbon or rum to the pudding for grown-up gatherings
- Try banana pudding cups in mason jars for individual servings
Wafer alternatives:
- Graham crackers work in a pinch
- Shortbread cookies add a buttery richness
- Chessmen cookies are actually Magnolia Bakery’s secret weapon (some say they use these instead of Nilla Wafers)
Make Ahead Tips
This dessert was basically designed to be made ahead.
Mix up the pudding mixture and store it in an airtight container in the fridge for up to 2 days before assembling. Just give it a good stir before using.
You can also assemble the entire dessert up to 24 hours before serving. Cover it tightly with plastic wrap pressed directly against the top layer to prevent browning.
If you’re bringing this to a party, transport it in a cooler with ice packs. Nobody wants warm banana pudding.
How to Make Magnolia Bakery Banana Pudding
Here’s the step-by-step process. It’s easier than you think.
Step 1: Make the pudding base
Grab your large mixing bowl and pour in the sweetened condensed milk and ice-cold water. Whisk them together until fully combined. It should look smooth and creamy.
Add the instant vanilla pudding mix to the bowl. Whisk vigorously for about 2 minutes. You want this mixture thick enough that it coats the back of a spoon. Let it sit in the fridge for 5 minutes to set up even more.
Step 2: Whip the cream
In a separate bowl (make sure it’s clean and dry), pour in your ice-cold heavy cream and vanilla extract. Using an electric mixer, beat on medium-high speed until stiff peaks form. This usually takes 3-4 minutes.
You’ll know it’s ready when you lift the beaters and the cream stands up in peaks that don’t flop over. Don’t over-whip though, or you’ll end up with butter.
Step 3: Combine everything
Take your chilled pudding mixture out of the fridge. Gently fold in the whipped cream using a rubber spatula. Use a folding motion (not stirring) to keep all that air you just whipped in.
The mixture should be light, fluffy, and cloud-like. If you see any streaks of pudding or cream, keep folding gently until everything is uniform in color.
Step 4: Slice the bananas
Peel your bananas and slice them into ¼-inch thick rounds. Remember to cut them at a slight angle for prettier layers.
Do this step right before assembling so the bananas don’t oxidize and turn brown. If you absolutely must slice them ahead, toss them in a tiny bit of lemon juice.
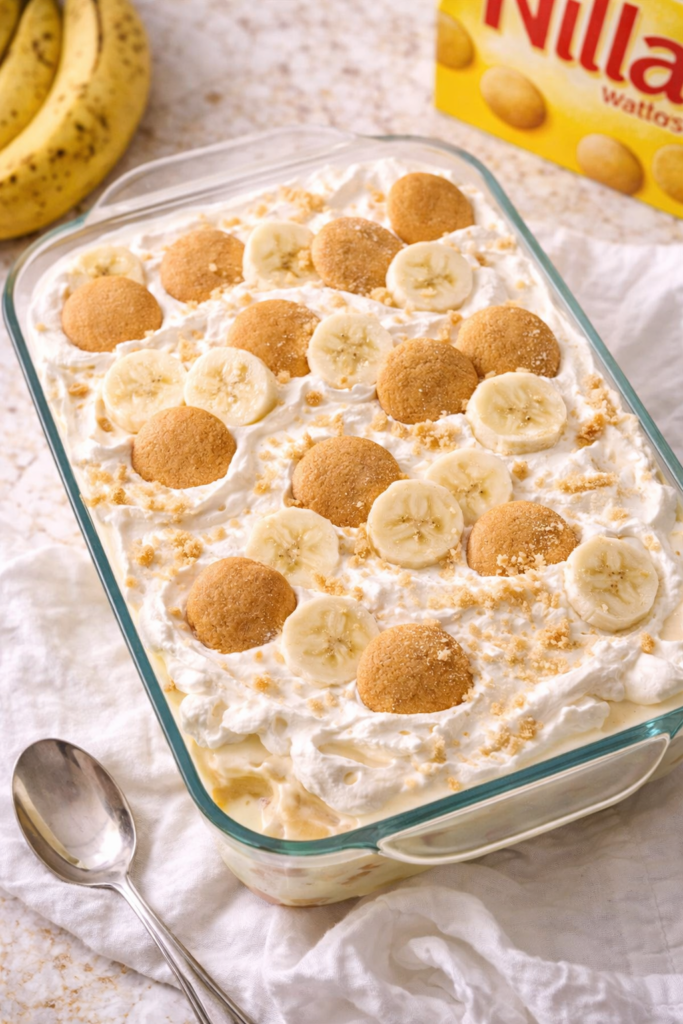
Step 5: Build the layers
Now comes the fun part. Grab your 9×13 inch dish.
Start with a layer of vanilla wafers on the bottom. Cover the entire surface, breaking a few wafers if needed to fill gaps.
Spread about one-third of the pudding mixture over the wafers. Don’t worry about being perfect – rustic is fine.
Add a layer of banana slices, covering the pudding as much as possible. Some gaps are okay.
Repeat the layers two more times: wafers, pudding, bananas. You should end up with three complete layers.
Top the final layer with any remaining pudding mixture. Crush a handful of vanilla wafers and sprinkle them on top for that signature look.
Step 6: Chill and serve
Cover your dish with plastic wrap and refrigerate for at least 4 hours. Overnight is even better – the flavors meld together and the wafers soften to the perfect texture.
When you’re ready to serve, scoop generous portions into bowls. This dessert is rich, so a little goes a long way.
Nutrition Information (Per Serving)
Based on 12 servings
- Calories: 380
- Total Fat: 18g
- Saturated Fat: 11g
- Cholesterol: 55mg
- Sodium: 220mg
- Total Carbohydrates: 52g
- Dietary Fiber: 1g
- Sugars: 38g
- Protein: 4g
Keep in mind this is a dessert, not a health food. But sometimes you need a little indulgence, and that’s perfectly fine.
Pairing Suggestions
This banana pudding is rich and creamy, so it pairs best with:
Beverages:
- Strong black coffee (the bitterness cuts through the sweetness)
- Cold milk (classic and simple)
- Sweet tea (very Southern, very good)
- A crisp white wine like Riesling for adult gatherings
When to serve it:
- Summer BBQs and potlucks
- Birthday parties (kids and adults both love it)
- Holiday dinners when you want something different from pie
- Tuesday nights when you just need something sweet
It’s especially good after spicy food. The cool, creamy texture is like a reset button for your taste buds.
Leftovers and Storage
Store any leftovers in an airtight container in the refrigerator. It’ll keep for 3-4 days, though it rarely lasts that long in my house.
The texture will change slightly after the first day – the wafers get softer and more cake-like. Some people actually prefer it this way. I’m torn between loving the fresh crunch and the softer, more melded texture.
Don’t freeze this dessert. The bananas turn to mush and the pudding separates when thawed. Just make a smaller batch if you’re worried about waste.
If you notice the bananas starting to brown on top after a day or two, just scrape off that layer before serving. The pudding underneath will still taste perfect.
Frequently Asked Questions
Can I use homemade whipped cream from a can?
No, don’t do it. The pre-made stuff doesn’t have enough structure and will deflate. You need to whip heavy cream yourself to get that thick, stable texture. It only takes a few minutes and makes a huge difference.
Why are my bananas turning brown so quickly?
This is normal. Bananas oxidize when exposed to air. To slow it down, make sure you’re pressing plastic wrap directly on top of the pudding, eliminating air pockets. Some people add a tiny splash of lemon juice to the pudding mixture, but I find this changes the flavor slightly.
Can I make this without the condensed milk?
You could, but it wouldn’t be the same. The sweetened condensed milk is what gives this pudding its signature sweet, creamy flavor. If you try to substitute regular milk or something else, you’ll end up with a completely different dessert.
My pudding mixture seems too thin. What went wrong?
Make sure you let the pudding set in the fridge for at least 5 minutes after mixing. Also, check that you used instant pudding mix, not cook-and-serve. And your cream needs to be whipped to stiff peaks before folding – soft peaks won’t give you enough structure.
How many does this serve?
I’d say 12 generous servings or 16 smaller portions. This is a rich dessert, so people usually don’t need huge servings. When I bring this to parties, I always make extra though – there are never leftovers.
Can I double the recipe?
Absolutely. Just use two dishes or one really large trifle bowl. The ingredient proportions stay exactly the same when you double everything. I do this for big family gatherings all the time.
Do I have to use Nilla Wafers specifically?
Technically no, but they’re really the best option. The flavor and texture are perfect for this recipe. I’ve tried other vanilla wafers and they either got too soggy or didn’t taste right. Stick with the original if you can.
Is this really the same as Magnolia Bakery’s version?
It’s incredibly close. The main difference is that Magnolia Bakery sometimes uses Chessmen cookies in addition to or instead of Nilla Wafers. Try both and see which you prefer. I honestly think this homemade version is better because you can control the ratio of pudding to bananas to wafers.
Wrapping Up
There’s something special about making a dessert that people recognize and love from a famous bakery.
This banana pudding checks every box: it’s creamy, it’s nostalgic, it’s surprisingly easy to make, and it tastes incredible. The combination of soft bananas, crunchy wafers, and that sweet, cloud-like pudding is pure comfort in a dish.
The best part? You can make this any time the craving hits. No plane tickets, no waiting in line, no paying $12 for a small cup.
So grab those ingredients and give it a try. Your friends and family will think you’re a baking genius, and you don’t have to tell them how easy it actually was.
Have you tried making this yet? Drop a comment below and let me know how it turned out. And if you have any questions or your own pro tips, I’d love to hear them. Happy pudding-making! 🍌